| « 2021-07-28 | Tinkering | 2021-07-07 » |
Tinkering: 2021-07-22: Table Saw Riving Knife
Part 1: Table Saw Overview.
Part 2: Table Saw Wiring.
Part 3: Table Saw Motor Brake.
Part 4: this article.
Part 5: Table Saw Dust Collection.
This is part 4 of the table saw series. This article is about a new riving knife I made after my first attempt was not beautiful – it was not perfectly in line with the blade, and it was not tall enough to have room for mounting a dust collection hood.
 I tried to build the first one without taking the saw apart. Big mistake,
because I could not properly see whether the parts engage correctly, and
they did not, that's why the old riving knife was not in line with the blade.
I tried to build the first one without taking the saw apart. Big mistake,
because I could not properly see whether the parts engage correctly, and
they did not, that's why the old riving knife was not in line with the blade.
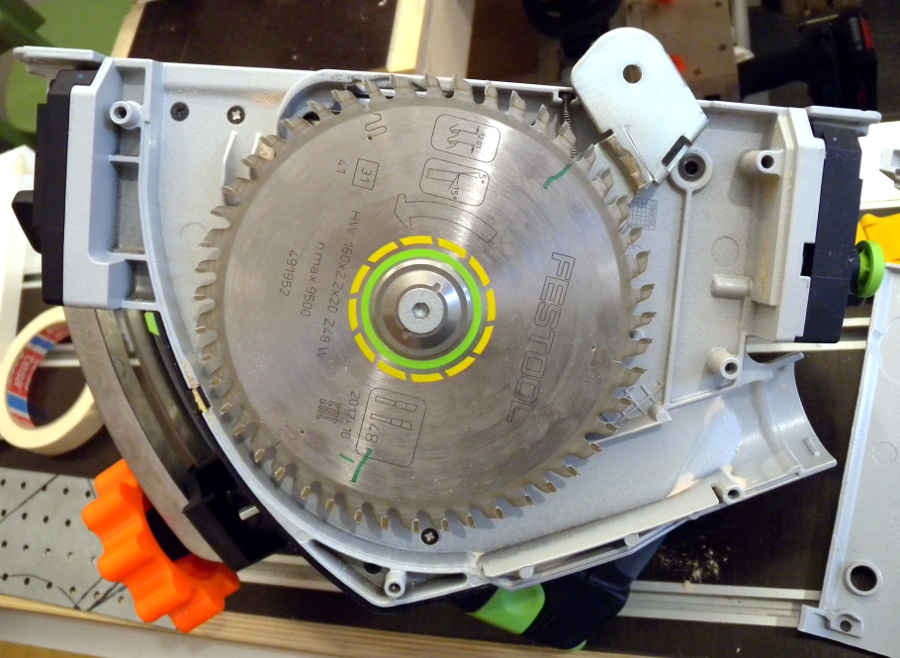
So let's open the saw again. A different lid this time: the blade cover. The bolts for this lid screw directly into the cast aluminium body – this is not made for frequent disassembly.
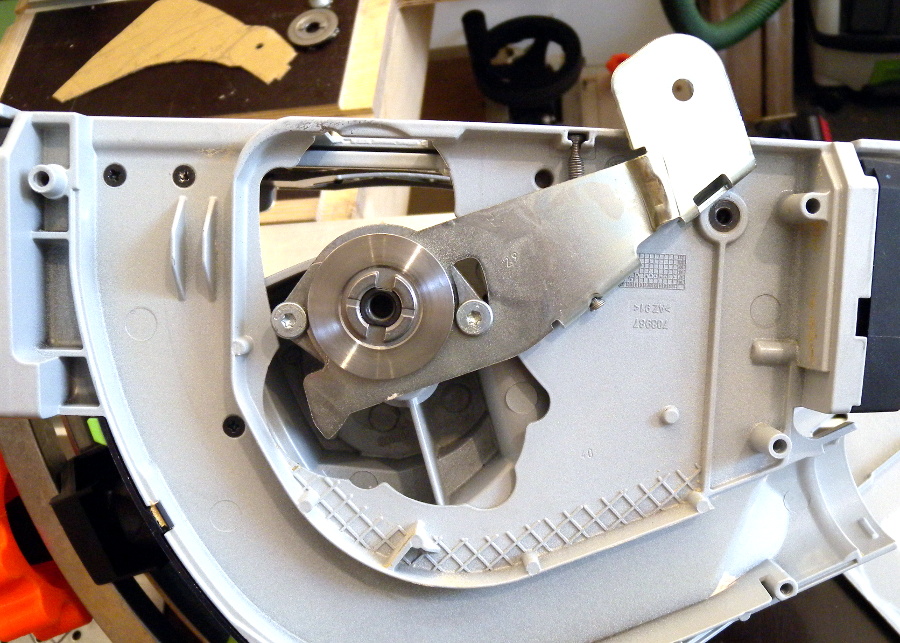 OK, I could not hold back and disassembled a little more. When removing the
blade, the embedded riving knife mechanism is visible. It is mounted around
the arbor of the saw, and it can rotate around it. This way, it can retract together
with the saw blade into the saw's body completely when the saw is not pushed down,
and it will emerge from the saw before the saw blade does.
OK, I could not hold back and disassembled a little more. When removing the
blade, the embedded riving knife mechanism is visible. It is mounted around
the arbor of the saw, and it can rotate around it. This way, it can retract together
with the saw blade into the saw's body completely when the saw is not pushed down,
and it will emerge from the saw before the saw blade does.
There is a spring at the top (actually the bottom: the picture is upside down), which pulls the riving knife out. This way, the embedded riving knife can always be pushed back into the saw's body so that plunge cuts are possible.
As already described before, there is another rotation centerpoint: the pivot point of the depth adjustment, and the embedded riving knife can also rotate around that if a bolt is put in that hole at its end.
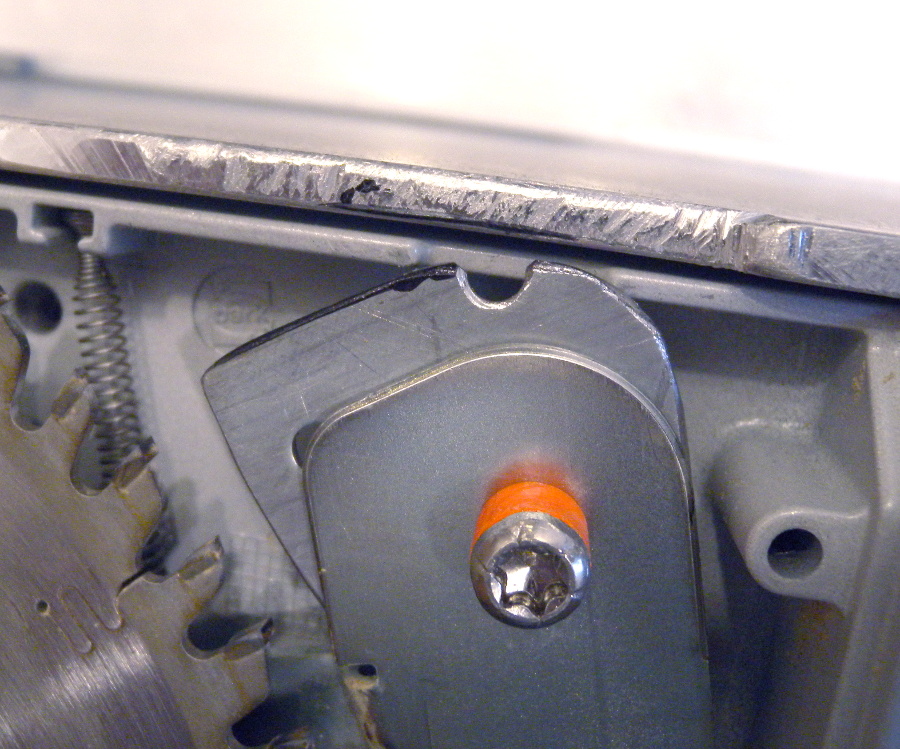
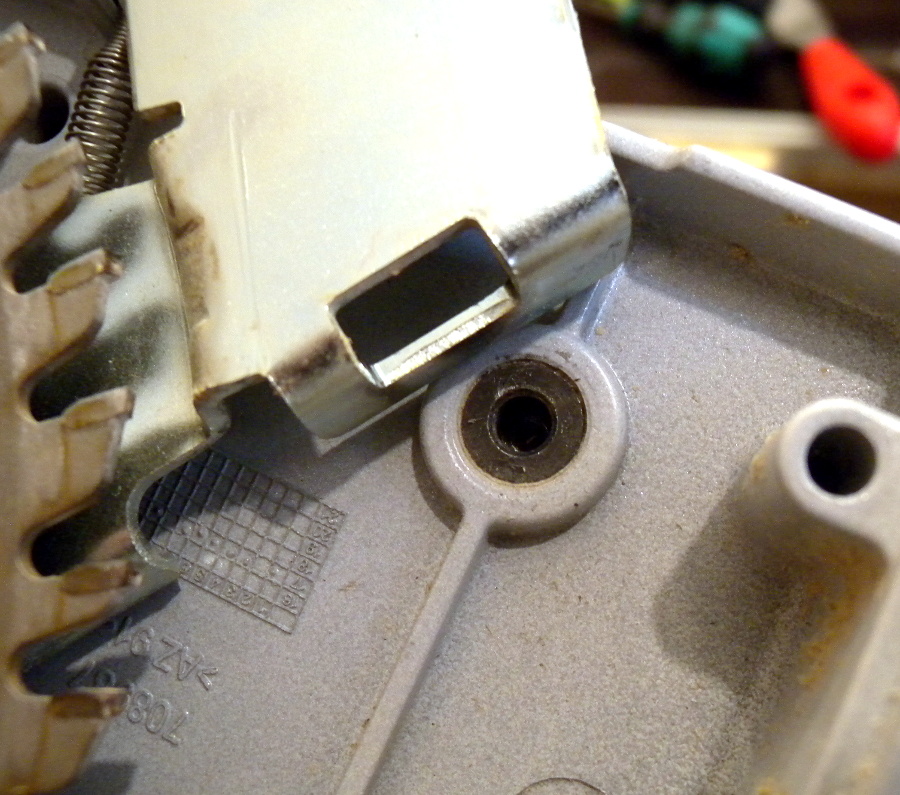 This is the pivot point of the depth adjustment mechanism. It is an unthreaded hole
of roughly 4.3mm. The tip of the bolt that is used to mount the large riving knife
to the embedded riving knife rotates in this socket.
This is the pivot point of the depth adjustment mechanism. It is an unthreaded hole
of roughly 4.3mm. The tip of the bolt that is used to mount the large riving knife
to the embedded riving knife rotates in this socket.
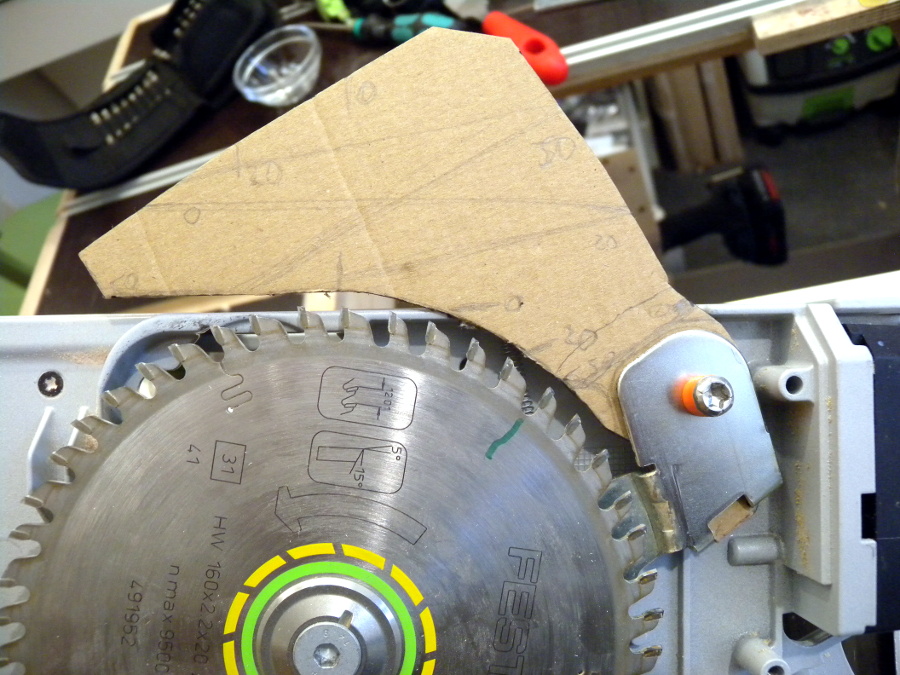 The new riving knife must be fitted closely to the embedded riving
knife. It is not practical to directly carve the new riving knife out of
metal, so I made a cardboard version first. I checked various depth
settings and marked them on the cardboard to know what will be roughly
where at which depth.
The new riving knife must be fitted closely to the embedded riving
knife. It is not practical to directly carve the new riving knife out of
metal, so I made a cardboard version first. I checked various depth
settings and marked them on the cardboard to know what will be roughly
where at which depth.
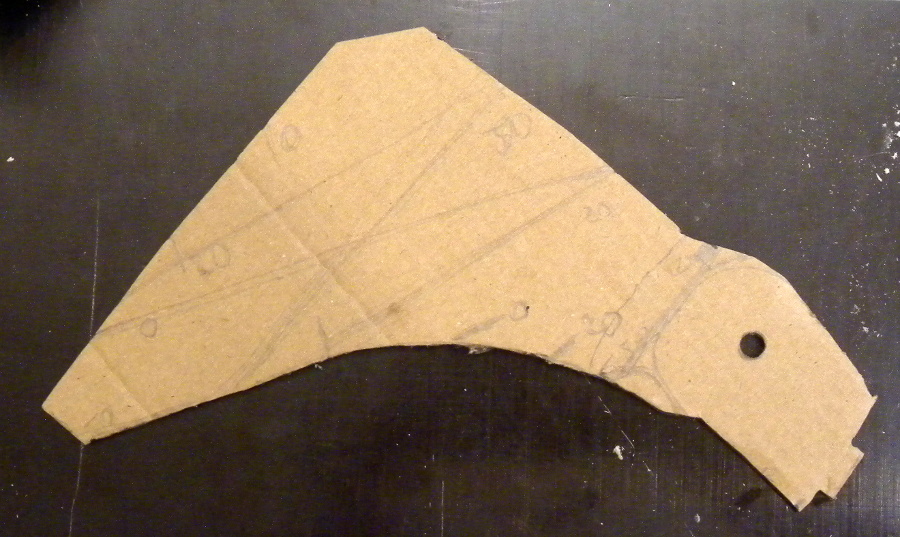 This is the resulting cardboard riving knife. It's only one piece,
while the real one will be two pieces so it is in line with
the blade and the embedded riving knife.
This is the resulting cardboard riving knife. It's only one piece,
while the real one will be two pieces so it is in line with
the blade and the embedded riving knife.
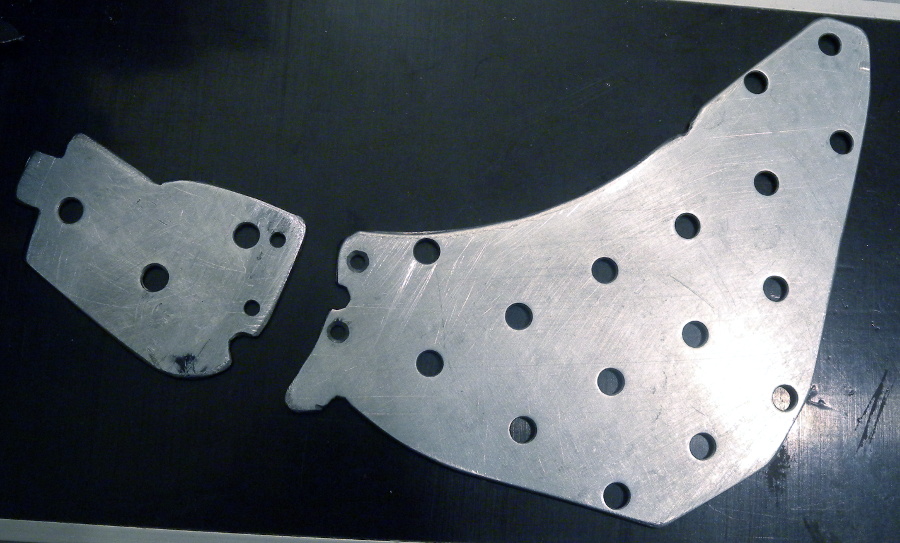
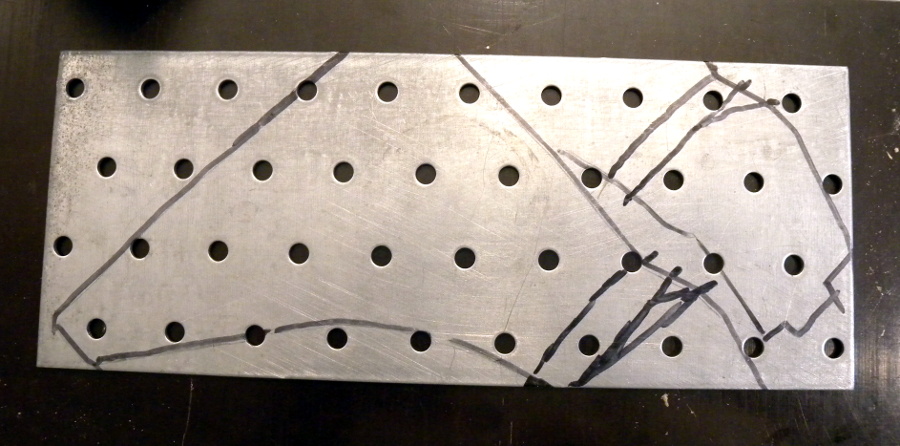 The outline was transferred to a piece of 2mm steel sheet. The existing
holes will be used for mounting the dust collection hood, and also
for the pivot point and mounting hole. Notice how one of them is positioned
exactly where the cardboard template has its mounting hole.
The outline was transferred to a piece of 2mm steel sheet. The existing
holes will be used for mounting the dust collection hood, and also
for the pivot point and mounting hole. Notice how one of them is positioned
exactly where the cardboard template has its mounting hole.
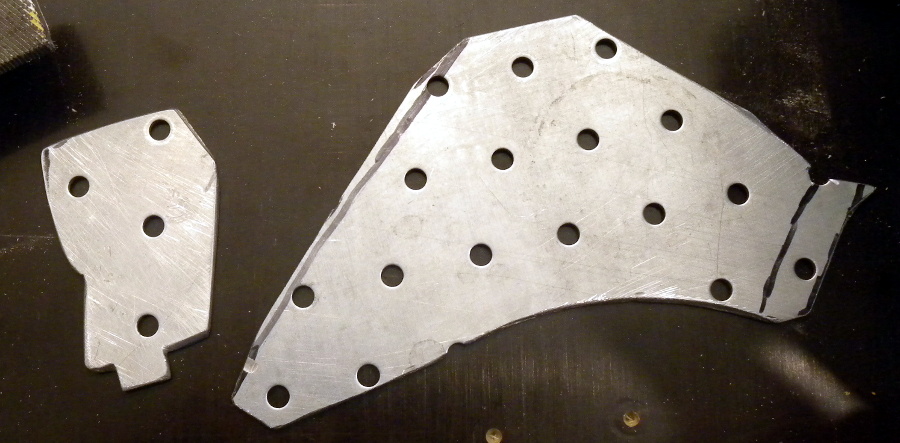 I cut the metal with the Dremel tool. Not the fastest method, but
I have no angle grinder or bandsaw, and I was too lazy for a
workout with the hack saw.
I cut the metal with the Dremel tool. Not the fastest method, but
I have no angle grinder or bandsaw, and I was too lazy for a
workout with the hack saw.
After the rough cut, which leaves really sharp burrs, all the edges were filed and sanded smooth.
 This is the smaller piece with an M6 thread cut into that cautiously
positioned mounting and pivot hole.
This is the smaller piece with an M6 thread cut into that cautiously
positioned mounting and pivot hole.
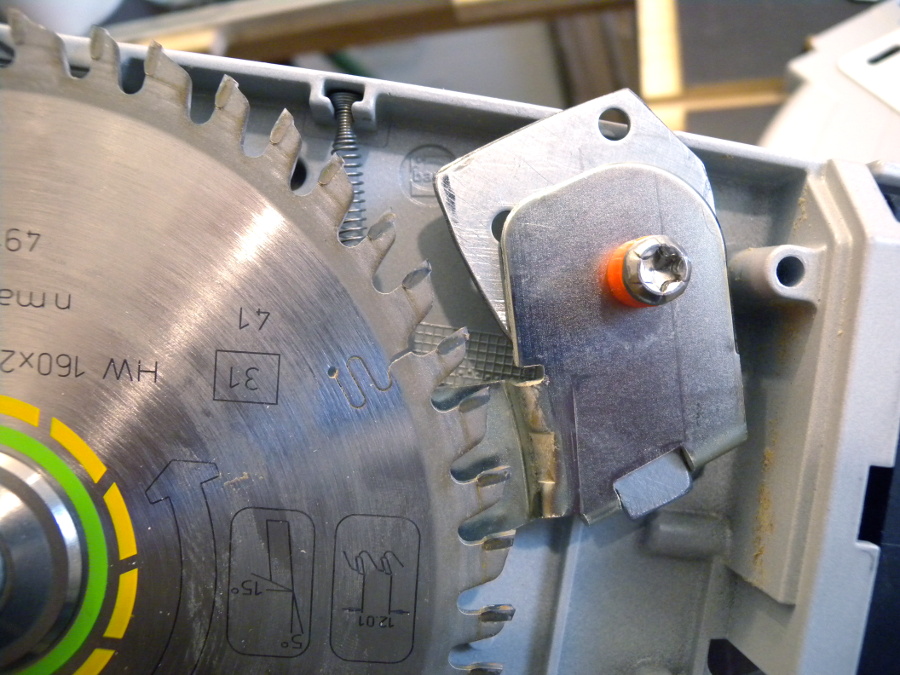 The small piece is bolted to the embedded riving knife. It is
still too large: it must not protrude from the saw's sole at
any depth of cut, so it still needs some filing down.
The small piece is bolted to the embedded riving knife. It is
still too large: it must not protrude from the saw's sole at
any depth of cut, so it still needs some filing down.
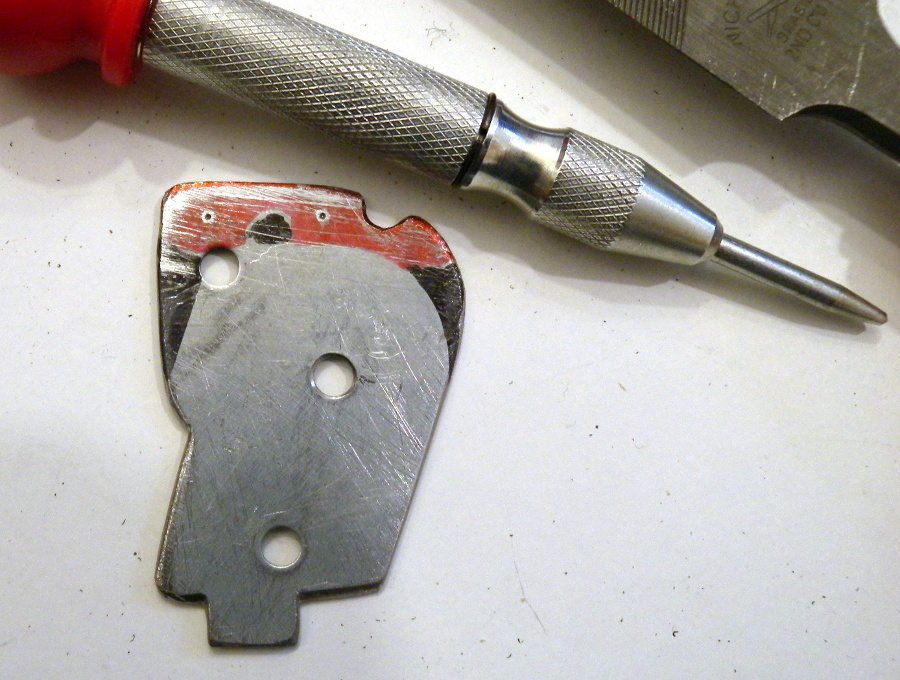
 This is the finished shape of the small part. I also mounted the
aluminium carrier plate to ensure that nothing interferes at
any depth of cut.
This is the finished shape of the small part. I also mounted the
aluminium carrier plate to ensure that nothing interferes at
any depth of cut.
 To fit the larger part, I attached it to the smaller part with a
magnet. It needed to be ground and filed down, too, until it had
the right shape to be placed in the right spot.
To fit the larger part, I attached it to the smaller part with a
magnet. It needed to be ground and filed down, too, until it had
the right shape to be placed in the right spot.
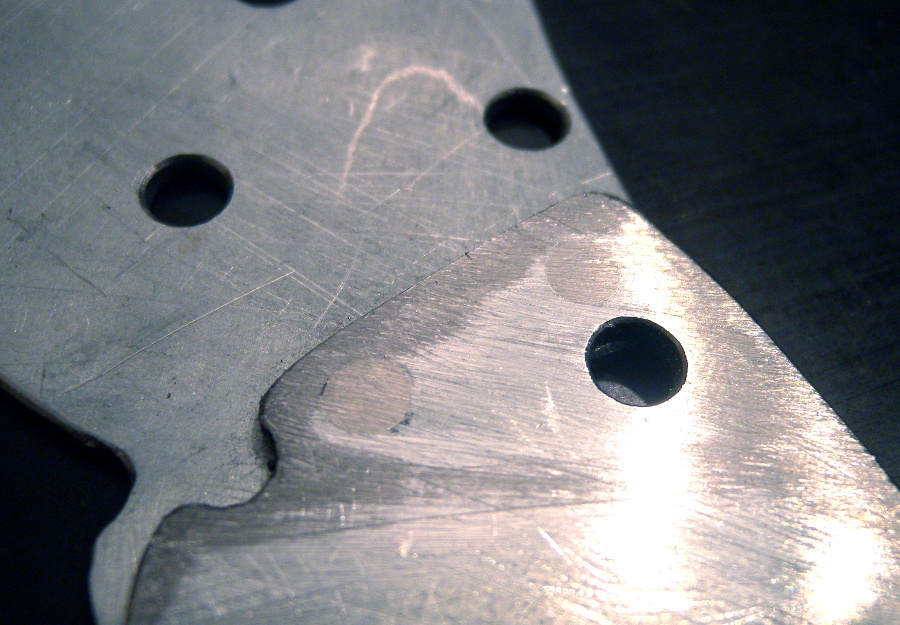
 I marked the position of the larger part on the smaller part (in
red) and then used a center punch to mark two riveting holes
where there's metal on both parts.
I marked the position of the larger part on the smaller part (in
red) and then used a center punch to mark two riveting holes
where there's metal on both parts.
 Then I drilled holes in both parts. They are countersunk at
the outside for the rivets to have something to grab on.
Then I drilled holes in both parts. They are countersunk at
the outside for the rivets to have something to grab on.
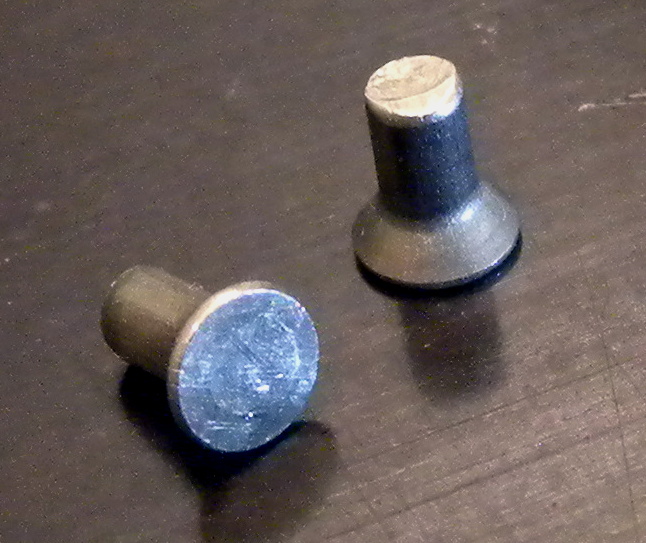 The rivets I used are 3mm countersuck solid steel
rivets (DIN 661).
The rivets I used are 3mm countersuck solid steel
rivets (DIN 661).
Now we need a hammer.
 This is the result after some hammering and filing. The
connection came out really clean: you can barely see the rivets
now. They need to be filed down completely, as there is no
space in the saw for any protrusions.
This is the result after some hammering and filing. The
connection came out really clean: you can barely see the rivets
now. They need to be filed down completely, as there is no
space in the saw for any protrusions.
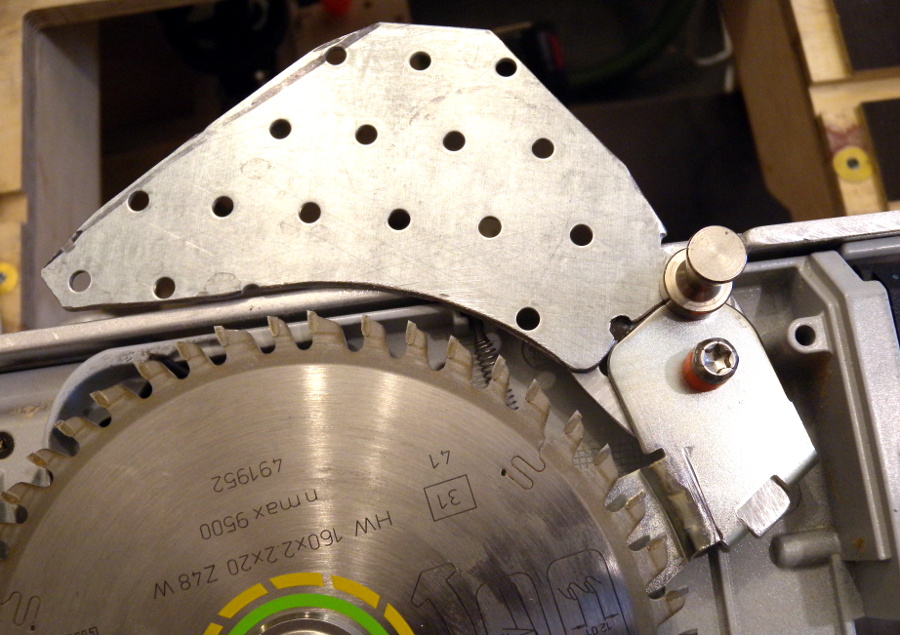
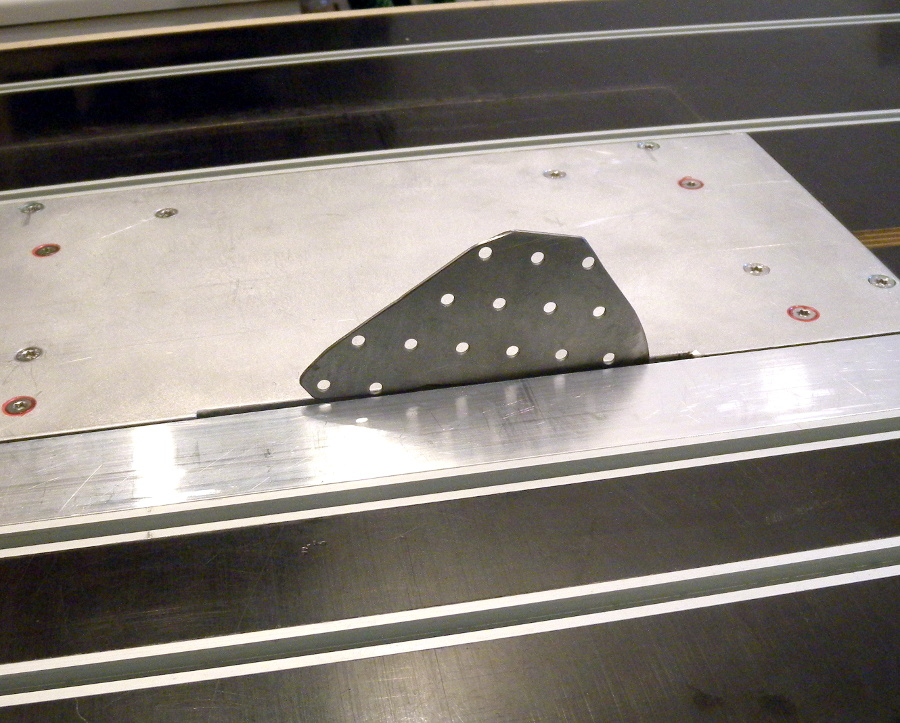
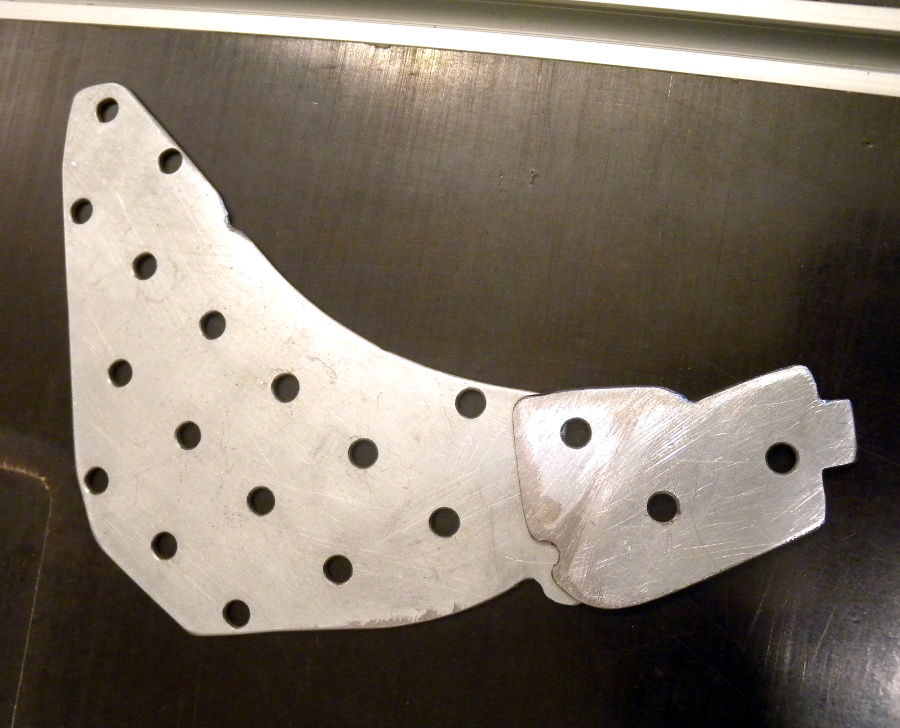 This is the finished riving knife. OK, maybe I'll cut it a
bit smaller later, it is quite large now. We'll see when the
dust collection hood is made.
This is the finished riving knife. OK, maybe I'll cut it a
bit smaller later, it is quite large now. We'll see when the
dust collection hood is made.
 Here's some depth adjustment action with the new riving knife attached. Thanks to
the special bolt with its smaller tip, the riving knife rotates together
with the saw blade around the pivot point of the depth adjustment. So it
keeps its position relative to the blade.
Here's some depth adjustment action with the new riving knife attached. Thanks to
the special bolt with its smaller tip, the riving knife rotates together
with the saw blade around the pivot point of the depth adjustment. So it
keeps its position relative to the blade.
 The shark.
The riving knife cannot be retracted further, so it is really in your way when using the table as a working surface. Not perfect – there must be room for improvement.
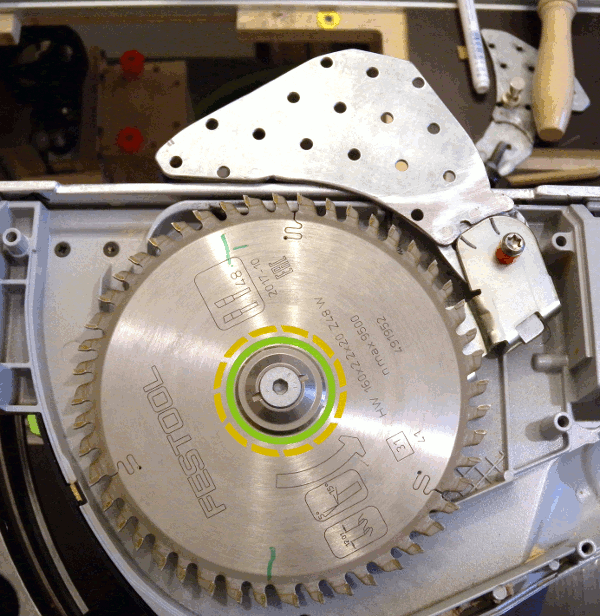
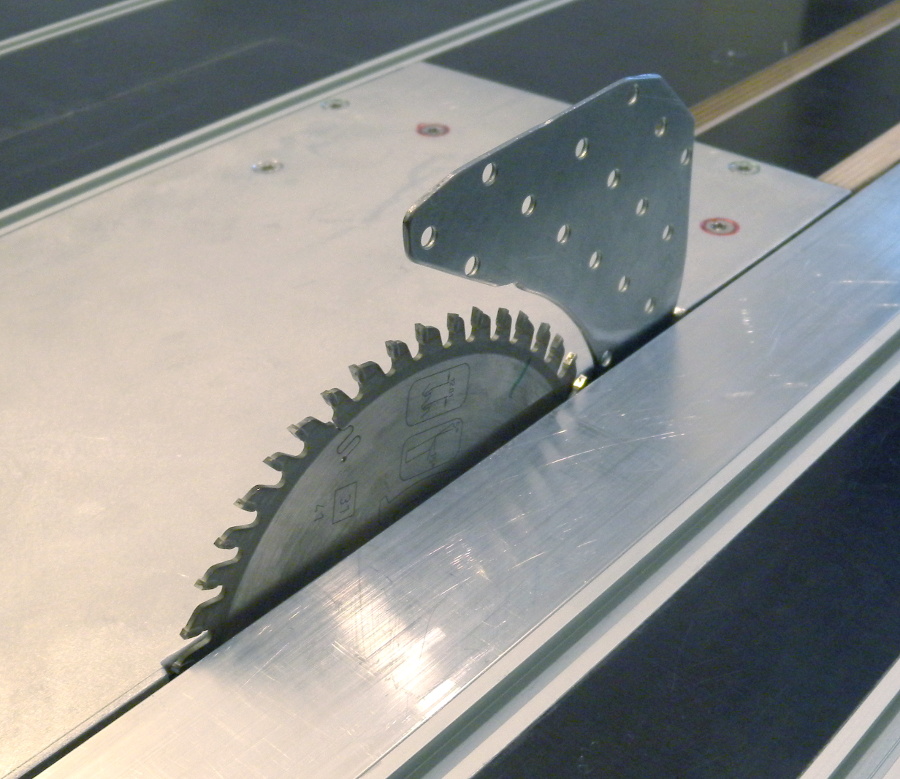 The new riving knife is now in line with the saw blade.
In the next part of the series, a dust collection hood will be attached to this new riving knife.