| « 2021-07-07 | Tinkering | 2021-06-14 » |
Tinkering: 2021-07-04: Table Saw Wiring
Part 1: There is an article giving an overview of the table saw.
When publishing this second part, I also added two detail pictures of the riving
knife in part 1.
Part 2: this article.
Part 3: Table Saw Motor Brake.
Part 4: Table Saw Riving Knife.
Part 5: Table Saw Dust Collection.
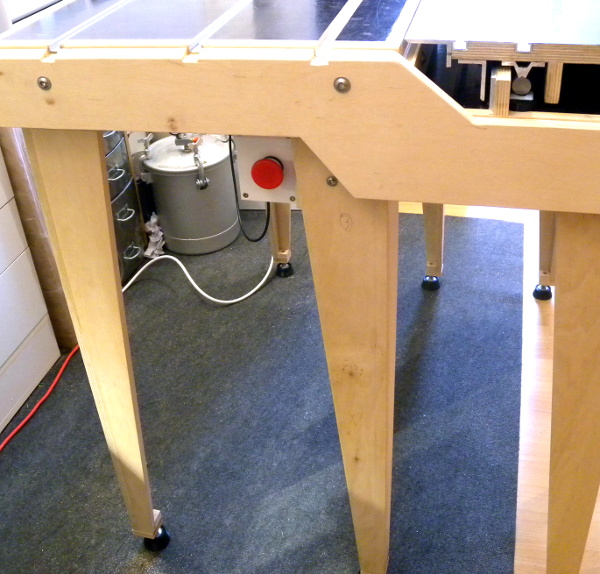
This article is about a few extensions that I added to the table, and particularly about the wiring. Since there is an electrical appliance – a circular saw – in it, the table needs electricity. I also want to switch the saw on an off, and there should be an emergency stop switch.
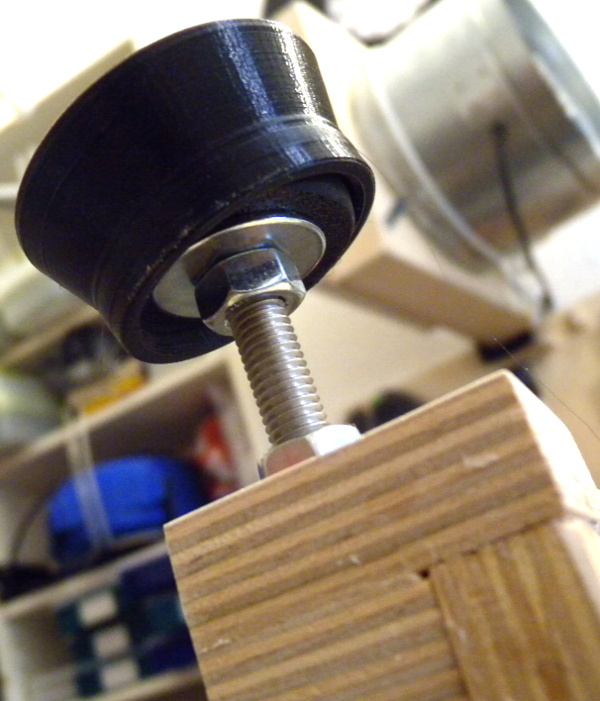 But let's start simple: the table needs feet. So I 3D printed these feet that can
swivel a bit. The feet take an M8 DIN933 bolt and are then screwed into the leg,
and this makes them height adjustable, which is important, because the floor in my
workshop is not perfectly level.
But let's start simple: the table needs feet. So I 3D printed these feet that can
swivel a bit. The feet take an M8 DIN933 bolt and are then screwed into the leg,
and this makes them height adjustable, which is important, because the floor in my
workshop is not perfectly level.
The picture is upside down because the table was upside down to mount the feet.
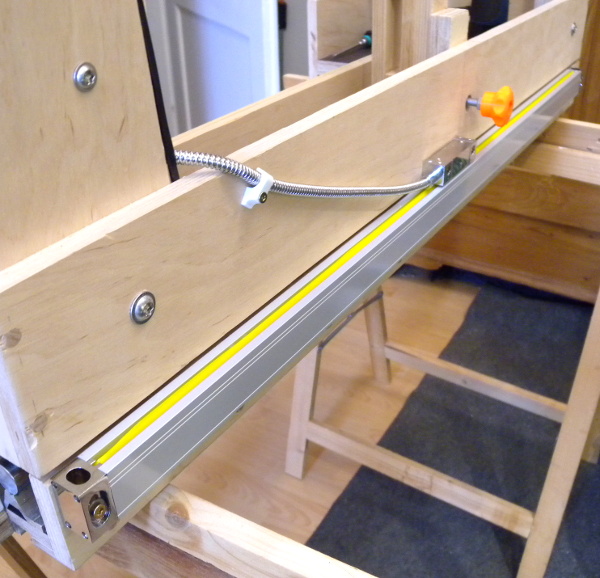 Another extension is this position sensor that
is mounted to the sled now. It is for the digital read-out (DRO). As I
already said in part 1, a DRO is probably overkill, but it can be done!
Another extension is this position sensor that
is mounted to the sled now. It is for the digital read-out (DRO). As I
already said in part 1, a DRO is probably overkill, but it can be done!
This picture is also upside down because for this whole operation, the table was upside down on saw horses for easy access.
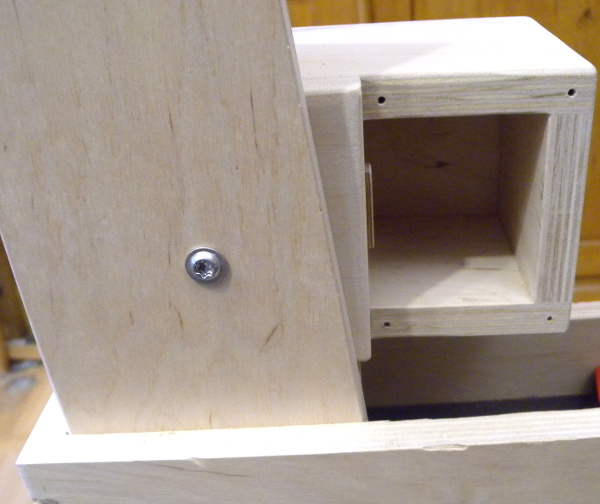 For the power switches and sockets, I made (on this very table saw!)
three wooden boxes to be
mounted to some of the legs of the table. This is one of the boxes
bolted to a leg, with the front opening for a switch.
For the power switches and sockets, I made (on this very table saw!)
three wooden boxes to be
mounted to some of the legs of the table. This is one of the boxes
bolted to a leg, with the front opening for a switch.
The boxes are quite bulky because I did not have plywood thinner than 15mm. But it's OK, there are no relevant space restrictions.
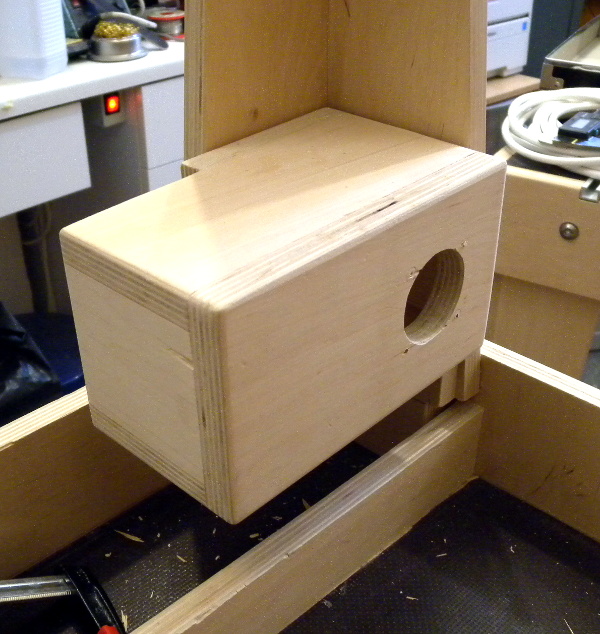 This is the back side of a power box, with an opening cut for a
power outlet socket. This is the box for the appliance power switch,
i.e., this will switch whatever is in the table insert, i.e., currently
the circular saw.
This is the back side of a power box, with an opening cut for a
power outlet socket. This is the box for the appliance power switch,
i.e., this will switch whatever is in the table insert, i.e., currently
the circular saw.
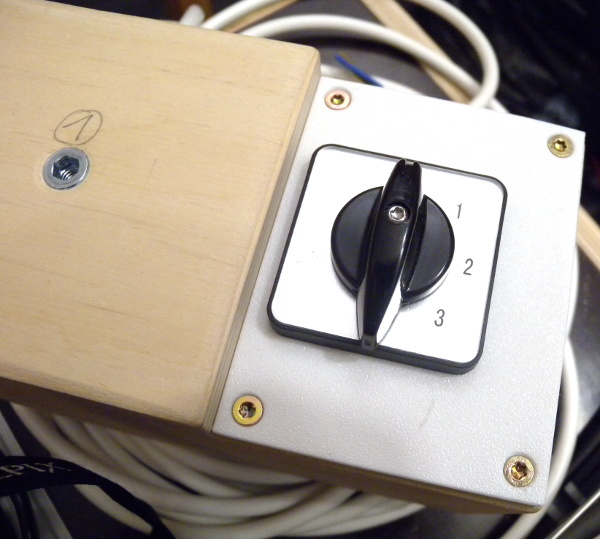 This is the appliance power switch, which has a very
positive click. The numbers go 0,1,2,3, but only positions 0 and 1
are available, because I reconfigured the switch from four to two
positions. Maybe I will add a different front plate some day.
This is the appliance power switch, which has a very
positive click. The numbers go 0,1,2,3, but only positions 0 and 1
are available, because I reconfigured the switch from four to two
positions. Maybe I will add a different front plate some day.
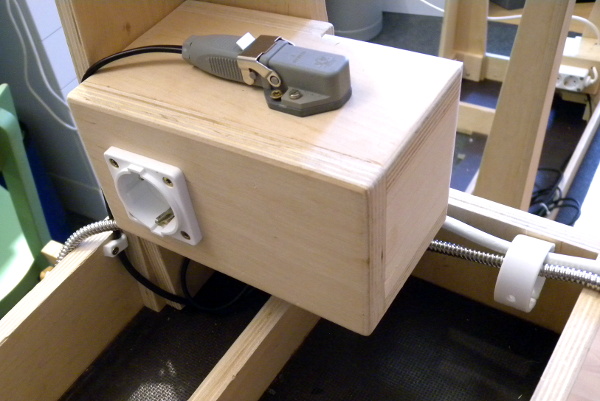 This is the finished appliance power box, with the single outlet for the
appliance – the saw in this case.
This is the finished appliance power box, with the single outlet for the
appliance – the saw in this case.
The connector on the bottom (the picture is upside down...) of the box is for a push switch for momentary operation of the saw, directly from the handle of the sled. I wanted this to ease operation and speed up work-flow when cutting. The connector used here is a Hirschmann STA connector, which is space efficient and very secure with that lock mechanism, and they allow 230V~/16A connections. I wonder why the euro plugs are so large.
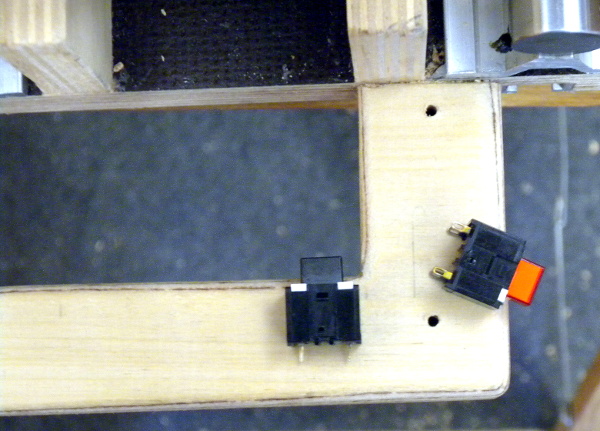 For the momentary switch on the sled handle, I used two push buttons.
I started by laying them out on the handle and checking where I can
reach them comfortably. They are on opposite sides of the handle to
avoid accidental operation, and both need to be pushed to switch on
the saw. Of course, main table power needs to be on, too.
For the momentary switch on the sled handle, I used two push buttons.
I started by laying them out on the handle and checking where I can
reach them comfortably. They are on opposite sides of the handle to
avoid accidental operation, and both need to be pushed to switch on
the saw. Of course, main table power needs to be on, too.
These are Omron A3A switches, which are positively clicky. I like that, because you get a feedback when the circuit closes.
The red button can be illuminated with an LED – maybe I'll connect it one day. For now, it is an unused feature.
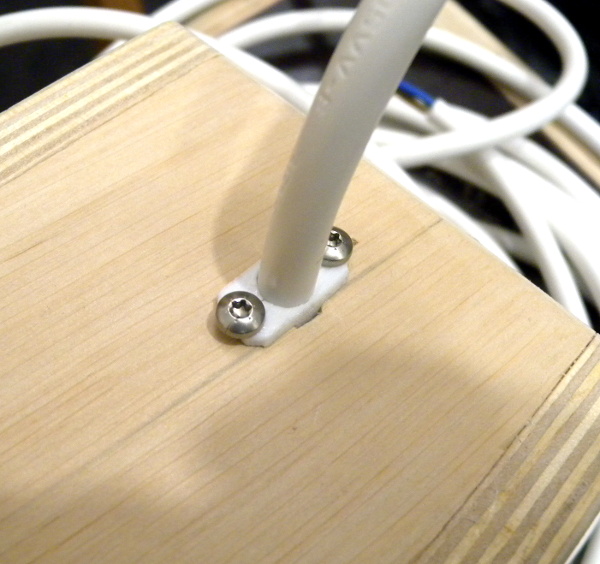
 Then I 3D printed a small box for the switches and screwed it to the
underside of the handle.
Then I 3D printed a small box for the switches and screwed it to the
underside of the handle.
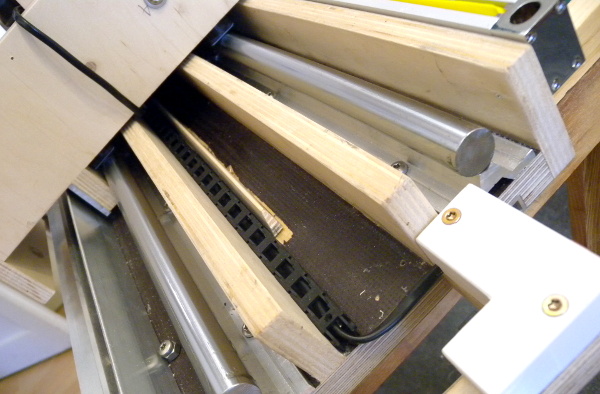
The cable for the switch runs in a drag chain inside the sled. This is the bottom view of the drag chain.
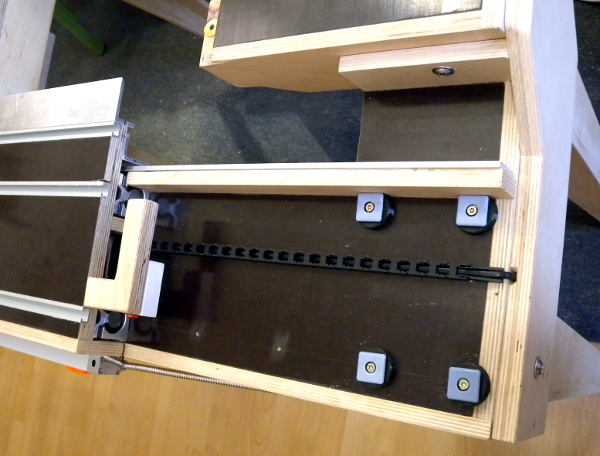 This is the top view of the sled, drag chain, and handle.
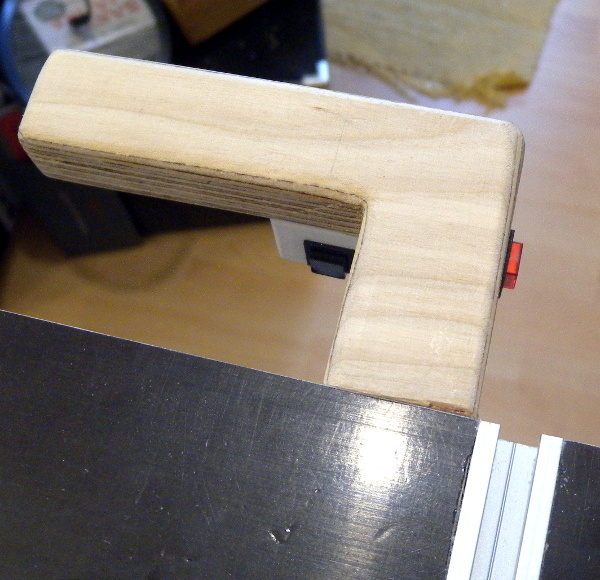 And this is the top view of the handle with the two buttons. They can
be operated very comfortably.
And this is the top view of the handle with the two buttons. They can
be operated very comfortably.
The buttons switch on a relay in the applicance power box, and that relay switches in parallel to the power switch, so either the relay or the switch will turn on the saw. I used a relay because the push buttons are rated only for 2A, but I need 8A for the saw. The relay also has the advantage that I can switch both power lines, L and N, just like with the switch. A safety feature in a country where power plugs and sockets are symmetrical so you never know which wire is N and which is L! (Why do they even use different colours?)
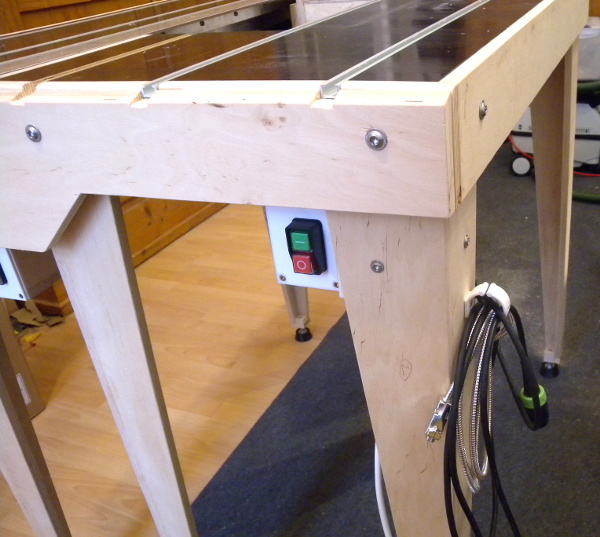 This is the
main power switch, which is a no-volt release
switch that keeps power on with an electromagnet (a solenoid), so it
opens when input power is disconnected from the table, or
when the emergency stop button is hit. I.e., this magnetic switch
ensures that table power stays off even when input power is restored.
This is the
main power switch, which is a no-volt release
switch that keeps power on with an electromagnet (a solenoid), so it
opens when input power is disconnected from the table, or
when the emergency stop button is hit. I.e., this magnetic switch
ensures that table power stays off even when input power is restored.
The switch is the current standard design used for many such machine switches. I do not like the design ergonomically, because it is not intuitive to me which button to hit for 'off'. Yes, I know, one of them is raised. Still, on my drill press, I typically blindly operate such a switch and constantly press the wrong button. Anyway, this is the only magnetic switch that I could find. I would have liked a rotary switch much more, one that mechanically springs back to 0 when the input power is disconnected. It seems such switches are not easily available anymore – I am sure I have seen this in the past. There are emergency stop buttons that are turned to switch on and pushed to switch off, but I found none that also deactivates on power failure.
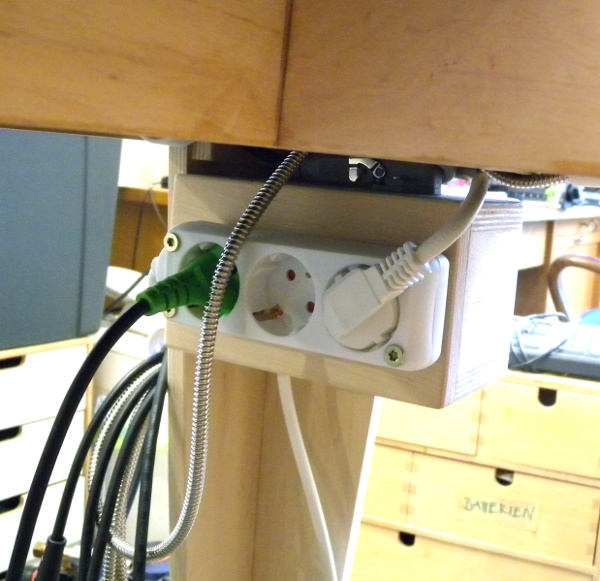 This is back side of the main power box with three sockets for
table power. The white plug on the right connects the appliance power
box. The middle one is probably going to be connected to some kind
of light. I want to see clearly that table power is on, so I am thinking
of putting some LED lights underneath the table, so it is clearly visible
close to the saw.
This is back side of the main power box with three sockets for
table power. The white plug on the right connects the appliance power
box. The middle one is probably going to be connected to some kind
of light. I want to see clearly that table power is on, so I am thinking
of putting some LED lights underneath the table, so it is clearly visible
close to the saw.
This socket can also be used to connect other appliances to be operated on the table, like a hand-held sander, or jigsaw, or drill, or whatever. That's why there are three sockets.
 Closeup of the power cable of the table: it's secured with a
3D printed clamp. This connects to the power outlet that
automatically switches on the dust collection (currently the
shop vac or two of them). So anything that
draws sufficient power from the table engages the
dust collection.
Closeup of the power cable of the table: it's secured with a
3D printed clamp. This connects to the power outlet that
automatically switches on the dust collection (currently the
shop vac or two of them). So anything that
draws sufficient power from the table engages the
dust collection.
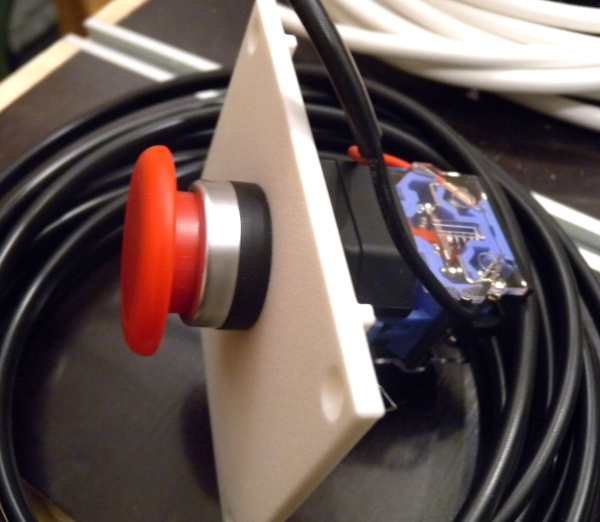 This is the emergency stop push button, mounted to a 3D printed
lid. The button is a circuit breaker, i.e.,
a normally connected (NC) switch. When pushed, power will fail and
the magnetic main power switch disengages and power is kept off.
This is the emergency stop push button, mounted to a 3D printed
lid. The button is a circuit breaker, i.e.,
a normally connected (NC) switch. When pushed, power will fail and
the magnetic main power switch disengages and power is kept off.
This is a momentary switch, i.e., it reconnects when released, so only together with the magnetic main switch, power is kept off. It would surely be possible to use a switch here that stays off by itself, like the mentioned rotate for on and push for off switches, but I think there are enough ways to switch off power now, and I do not want to go on quests for the reason why the saw does not switch on.
 This is the third wooden box with the emergency stop button. It is
connected to the main power box to deactivate power right at the
inlet of the table. This also uses a Hirschmann STA connector, but it
is not visible here.
This is the third wooden box with the emergency stop button. It is
connected to the main power box to deactivate power right at the
inlet of the table. This also uses a Hirschmann STA connector, but it
is not visible here.
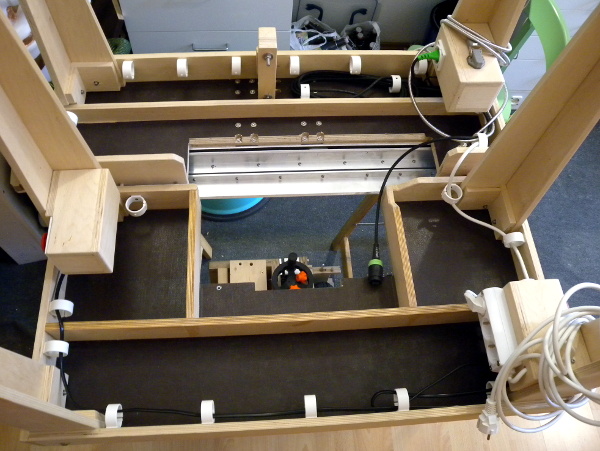 Finally, this is an overview of the cabling on the underside of
the table. I printed a few cable holders to guide the cables. The
result is quite neat, maybe too neat for this picture where the
cabling is barely visible. The main power box is bottom-right, the
appliance power box is top-right, and the emergency off box is on
the left.
Finally, this is an overview of the cabling on the underside of
the table. I printed a few cable holders to guide the cables. The
result is quite neat, maybe too neat for this picture where the
cabling is barely visible. The main power box is bottom-right, the
appliance power box is top-right, and the emergency off box is on
the left.
In the next episode, we will be tackling a problem with the saw itself: it has a very useful electronic motor brake when used as a hand-held device. The brake stops the rotating blade within one second or so. But that brake triggers only with the built-in switch, but not when power is disconnected to the saw, like the table does. So the saw keeps rotating for a while (a long while when you are impatient to look at the cut-off you just made). This needs to be fixed for safety reasons.