| « 2024-03-31 | Tinkering | 2022-05-12 » |
Tinkering: 2024-03-16: Kitchen Table
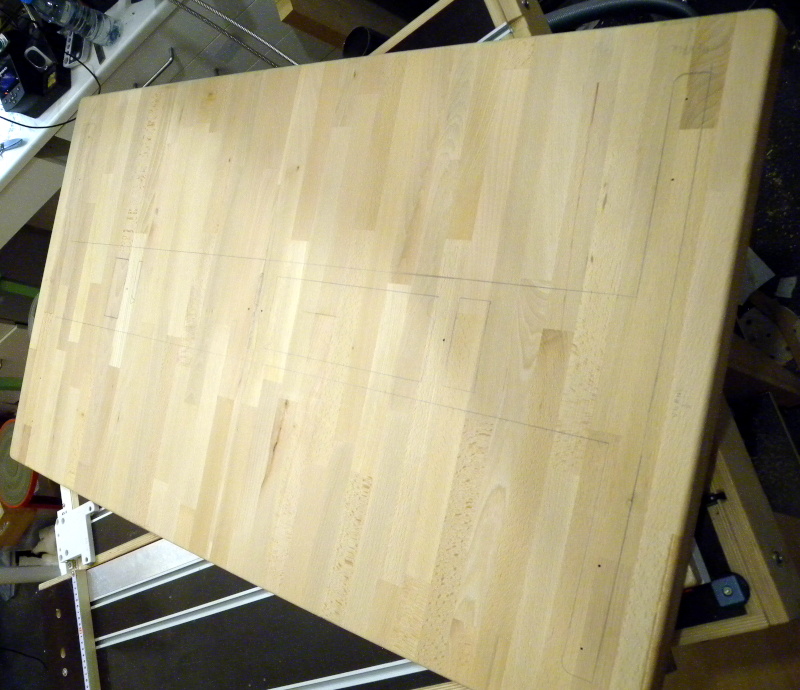 For 13 years, we had an old kitchen table and I had a plan to make a new one.
There was even already the top for it, but I simply couldn't make up my mind how to make the legs for the table. It needed to be something with less than four legs, because the legs of the old table were always in the way, I wanted a center leg style table. But no design appeared to be just right.
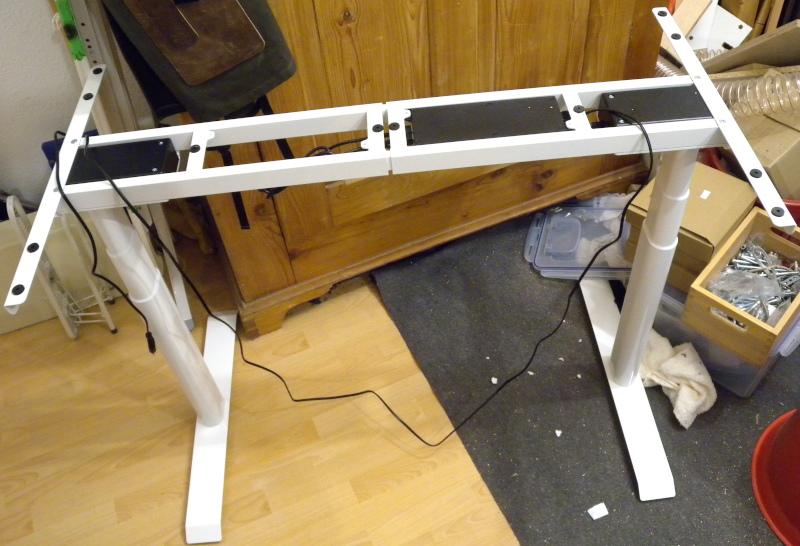 Then came Matthias Wandel
and presented and examined a height-adjustable desk frame.
For me, it was the opportunity to get our new kitchen table done. We don't really
need a height adjustable kitchen table, but the table leg decision was easy now.
Then came Matthias Wandel
and presented and examined a height-adjustable desk frame.
For me, it was the opportunity to get our new kitchen table done. We don't really
need a height adjustable kitchen table, but the table leg decision was easy now.
OK, so this project is really simple, right? Just put that top onto the frame and it's done. That's what I thought.
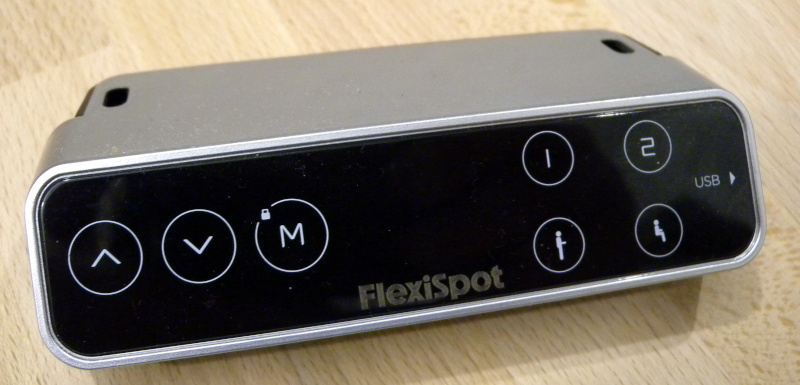 But then came the next decision: where to put the control panel? It's a touch control
with a few advanced features like four programmable positions and a locking function
against accidental usage. It has a 7-segment display for the height, and the display is
really needed for programming and for other advanced functions, so it's not a good idea
to hide the control panel too much.
But then came the next decision: where to put the control panel? It's a touch control
with a few advanced features like four programmable positions and a locking function
against accidental usage. It has a 7-segment display for the height, and the display is
really needed for programming and for other advanced functions, so it's not a good idea
to hide the control panel too much.
But we did not like the plastic look, and just could not find an agreeable spot to attach this thing. Also, it takes up space horizontally, and would interfere with the drawers. Yes, drawers – more complication.
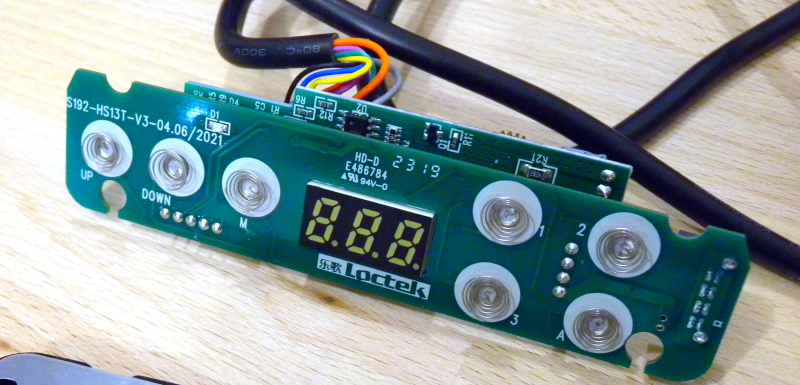 So I opened it. And it looked like it could be embedded into the table top itself.
Since it has touch buttons, how about using stainless steel screws directly in the wood
for control? And how about putting the display behind a thin layer of wood? Let's do that!
So I opened it. And it looked like it could be embedded into the table top itself.
Since it has touch buttons, how about using stainless steel screws directly in the wood
for control? And how about putting the display behind a thin layer of wood? Let's do that!
The electronics is a sandwich of two PCBs. To move the display somewhere else, this sandwich needs to be disassembled first.
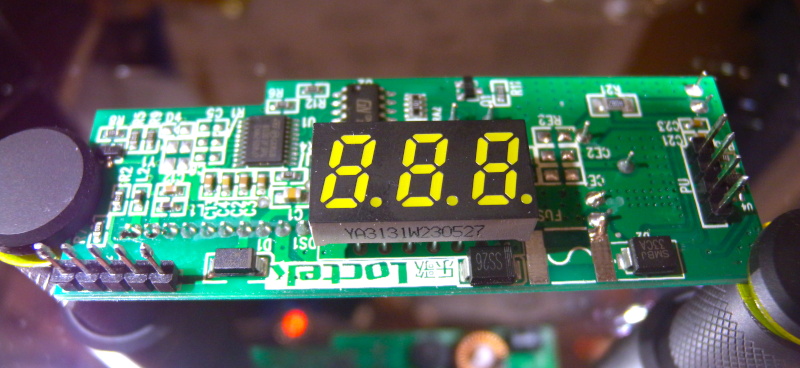 This is the PCB holding the LED display.
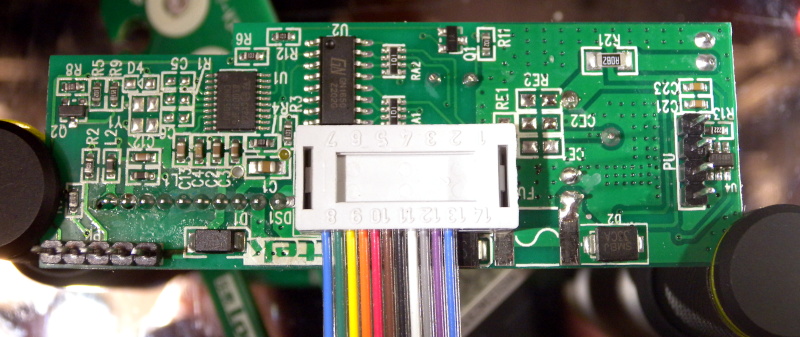 And this is the same, with the LED display replaced by a cable, so the display
can be moved somewhere else.
And this is the same, with the LED display replaced by a cable, so the display
can be moved somewhere else.
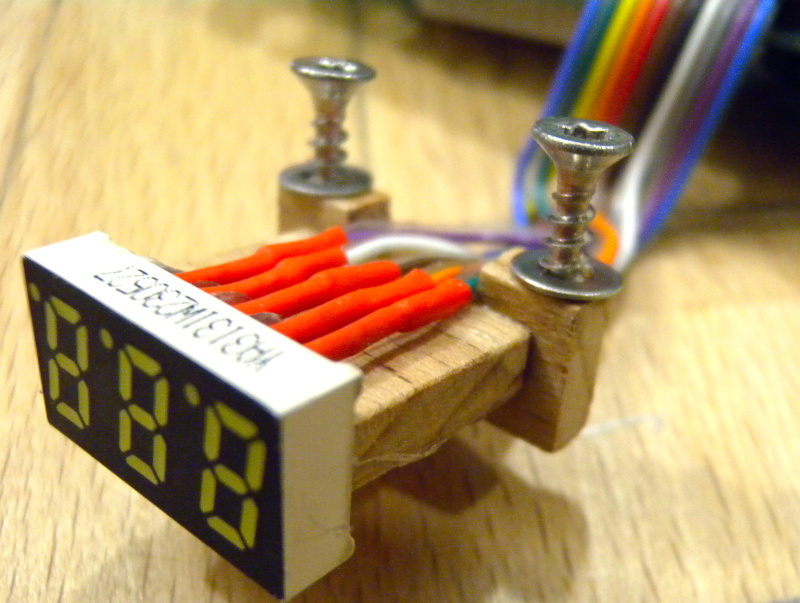 This is the display, with some adhoc wooden construction to screw it down. It's
very simply constructed with hot glue... Yes, I used hot glue. Well, the two
pieces of wood are glued together with PVA glue.
This is the display, with some adhoc wooden construction to screw it down. It's
very simply constructed with hot glue... Yes, I used hot glue. Well, the two
pieces of wood are glued together with PVA glue.
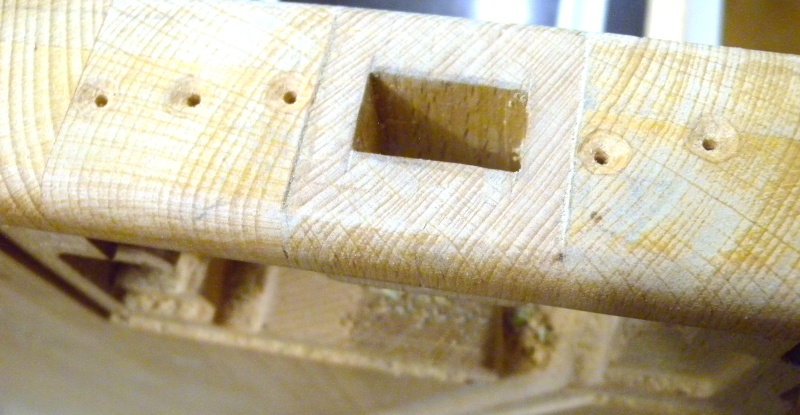
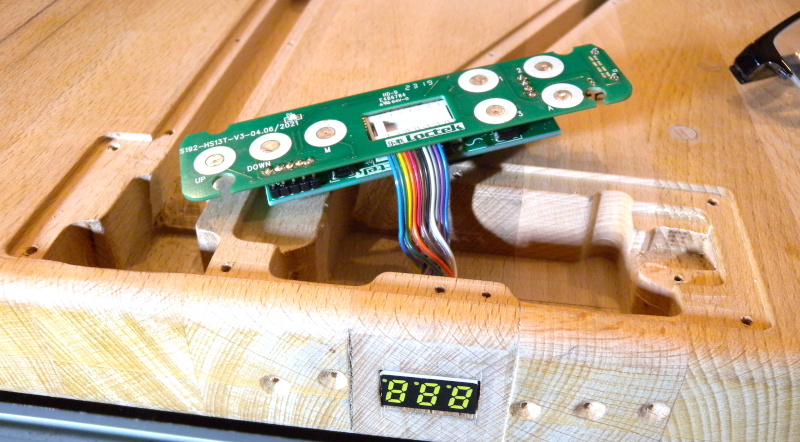
 This is an overview of the underside of the table after cutting out a place for
the electronics and the cables that need to be hidden. The cuts were made with a
router and a few 3D printed templates, after I had constructed the relevant parts
of the table in CAD.
This is an overview of the underside of the table after cutting out a place for
the electronics and the cables that need to be hidden. The cuts were made with a
router and a few 3D printed templates, after I had constructed the relevant parts
of the table in CAD.
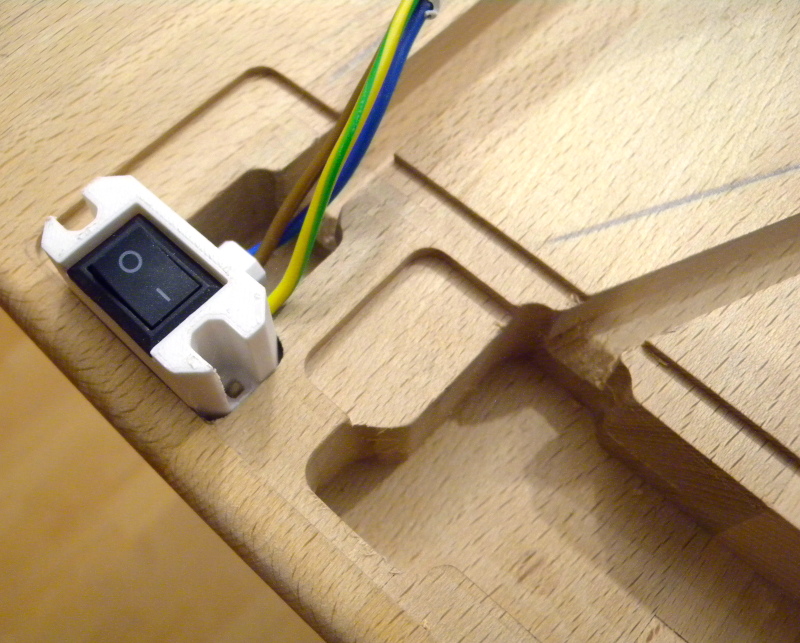 We also wanted a power switch,
because despite this drawing only 0.7W in standby, it's just weird to have an
electrified kitchen table unless it is really needed. To enclose all the wires
properly, I 3D printed a small mount for a switch I had lying around.
We also wanted a power switch,
because despite this drawing only 0.7W in standby, it's just weird to have an
electrified kitchen table unless it is really needed. To enclose all the wires
properly, I 3D printed a small mount for a switch I had lying around.
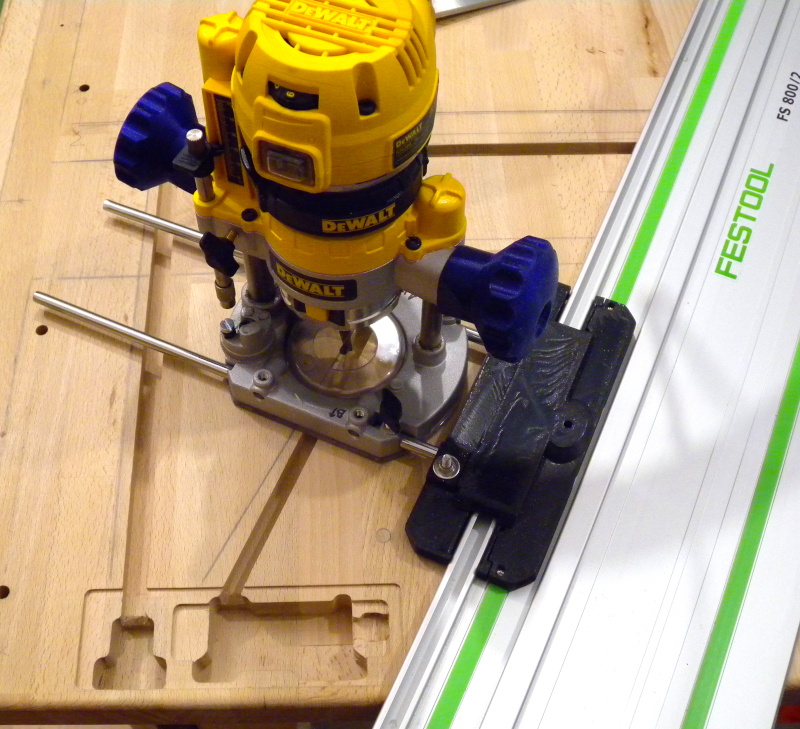 The channels for the cables were routed with a (3D printed) guide that runs on
a rail.
The channels for the cables were routed with a (3D printed) guide that runs on
a rail.
By the way, the handles on the router are also 3D printed because I did not like the ones it came with.
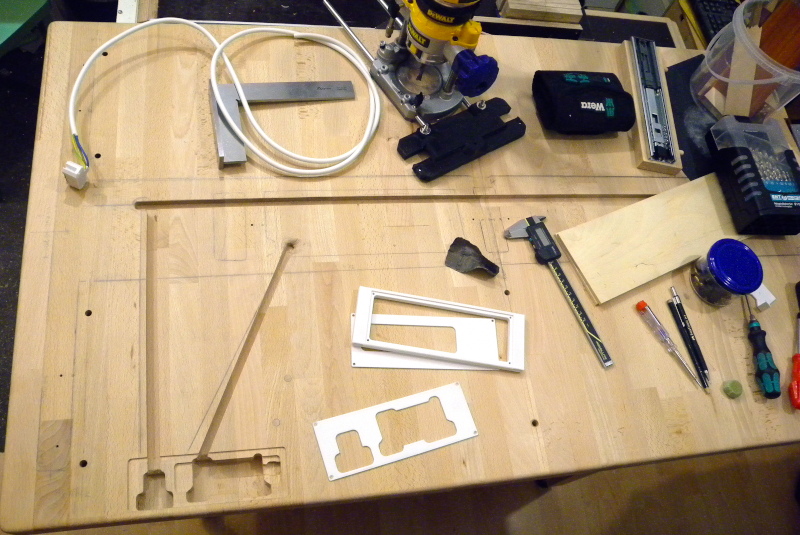
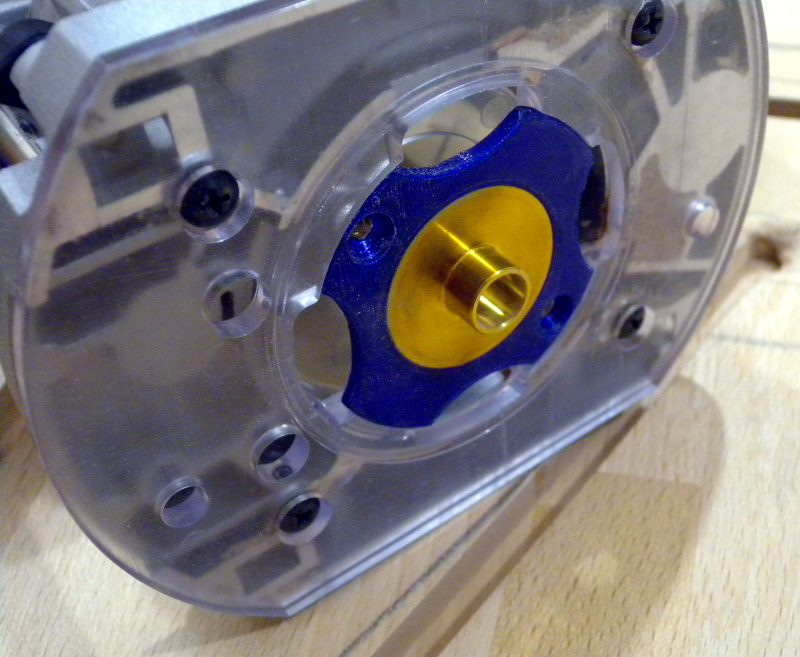 For the complex shapes like the electronics box, I used 3D printed templates and
a follower on the router that is like a sleeve around the router bit.
For the complex shapes like the electronics box, I used 3D printed templates and
a follower on the router that is like a sleeve around the router bit.
The sleeve is from a set that has several sizes of sleeves, and it is connected to the router by a 3D printed adaptor.
 For the display, I cut out an opening and a recess for the thin wooden
veneer that will hide it. These cuts were made with a cordless drill and a
chisel, and without any 3D printer to help.
For the display, I cut out an opening and a recess for the thin wooden
veneer that will hide it. These cuts were made with a cordless drill and a
chisel, and without any 3D printer to help.
 This is a test fit of the display. It is between the two up and down buttons
on one side, and three preprogrammed positions on the other. For space reasons,
there are only three of the four preprogrammed buttons.
This is a test fit of the display. It is between the two up and down buttons
on one side, and three preprogrammed positions on the other. For space reasons,
there are only three of the four preprogrammed buttons.
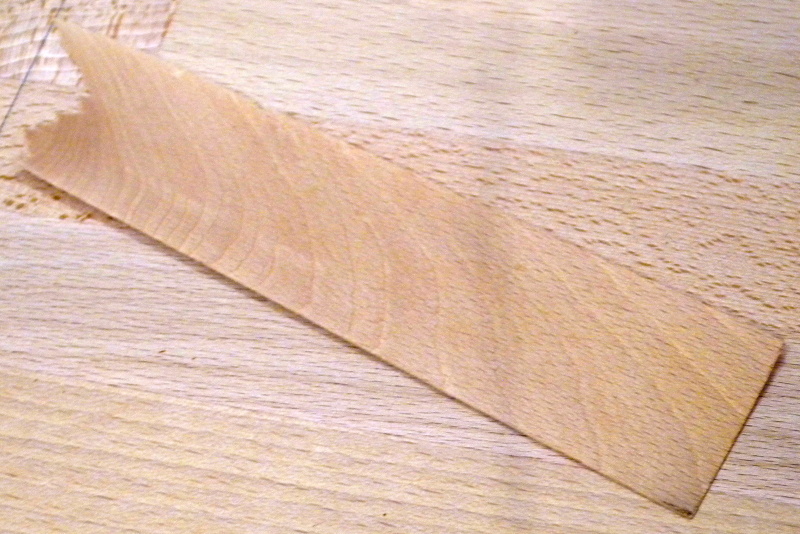 This is the piece of wood cut to about 0.6mm that will be in front of the display.
The display is very bright and easily shines through.
This is the piece of wood cut to about 0.6mm that will be in front of the display.
The display is very bright and easily shines through.
 That piece of wood was then glued into the recess and sanded down flush. It
looks good, despite not being the same grain direction.
That piece of wood was then glued into the recess and sanded down flush. It
looks good, despite not being the same grain direction.
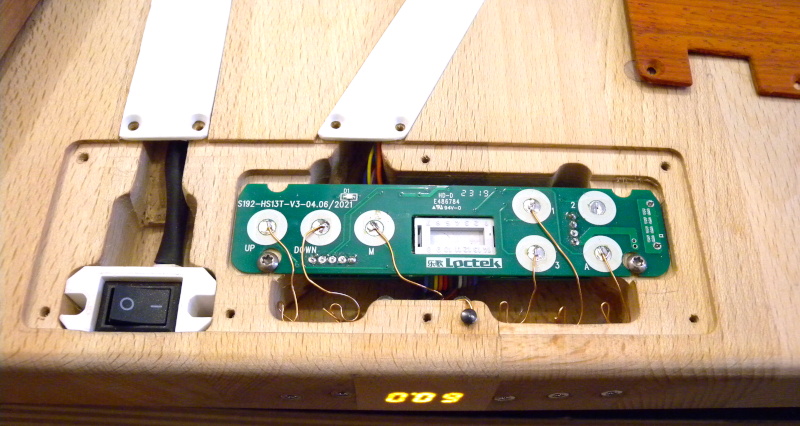 This is a test fit of the electronics and the power switch. The display works
nicely. Now we need a lid. Because the lid partially covers the power switch,
I wanted it to feel good, so it's made from wood instead of using a 3D print.
This is a test fit of the electronics and the power switch. The display works
nicely. Now we need a lid. Because the lid partially covers the power switch,
I wanted it to feel good, so it's made from wood instead of using a 3D print.
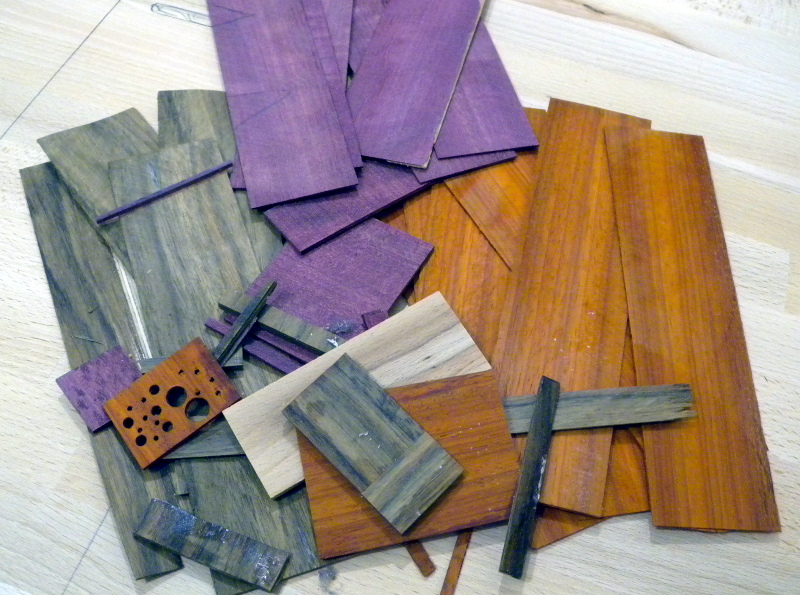 Luckily, from previous projects, I had some left-overs of colourful homemade
plywood from padouk (red), amaranth (violet), and dark walnut (dark brown). I
used a piece of padouk 2mm plywood for the lid.
Luckily, from previous projects, I had some left-overs of colourful homemade
plywood from padouk (red), amaranth (violet), and dark walnut (dark brown). I
used a piece of padouk 2mm plywood for the lid.
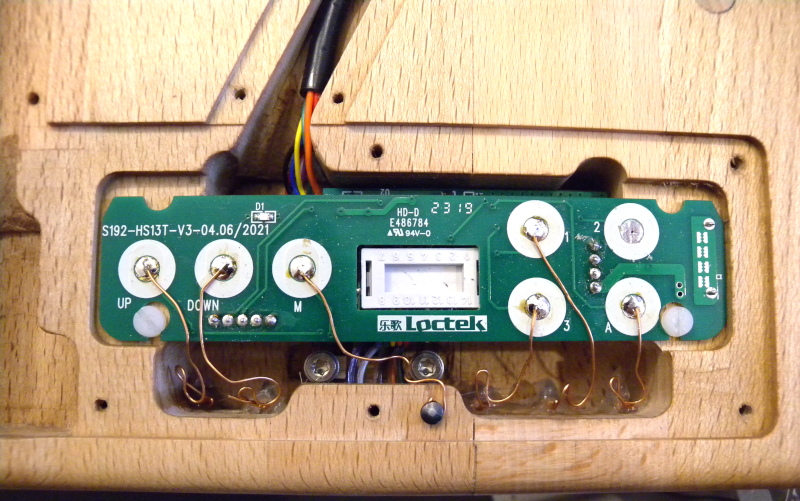 This is another view of the electronics where the wiring is visible. For
mounting the PCB, I used nylon screws, because metal screws acted as
random touch buttons. It seems that the touch button wires
on the PCB got too close to the screws, so nylon solves this.
This is another view of the electronics where the wiring is visible. For
mounting the PCB, I used nylon screws, because metal screws acted as
random touch buttons. It seems that the touch button wires
on the PCB got too close to the screws, so nylon solves this.
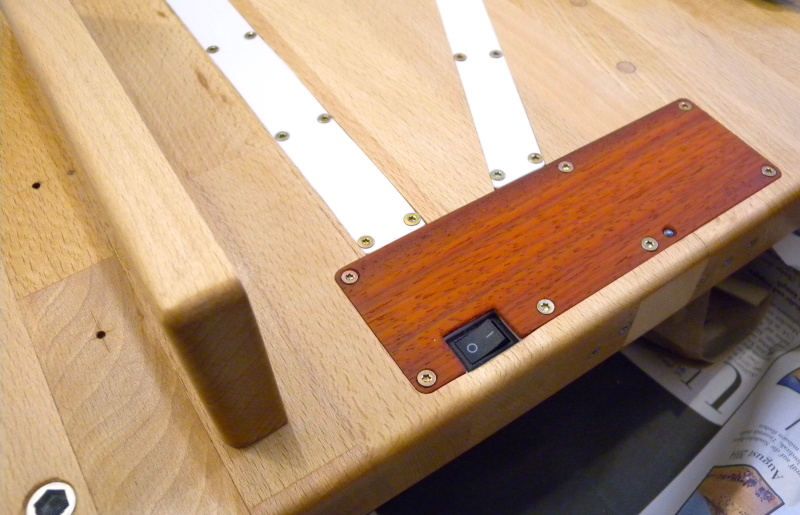 This is the closed electronics box. The white cable covers are 1.5mm ABS plastic
sheets cut to size. I won't touch those later, so there is no need for them to feel good.
This is the closed electronics box. The white cable covers are 1.5mm ABS plastic
sheets cut to size. I won't touch those later, so there is no need for them to feel good.
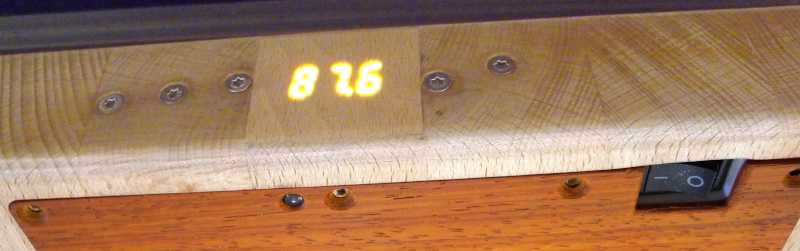 The LED display easily shines through the wood, and I like the torx screw heads as
touch buttons. It is much less blurred in reality than on this photo.
The LED display easily shines through the wood, and I like the torx screw heads as
touch buttons. It is much less blurred in reality than on this photo.
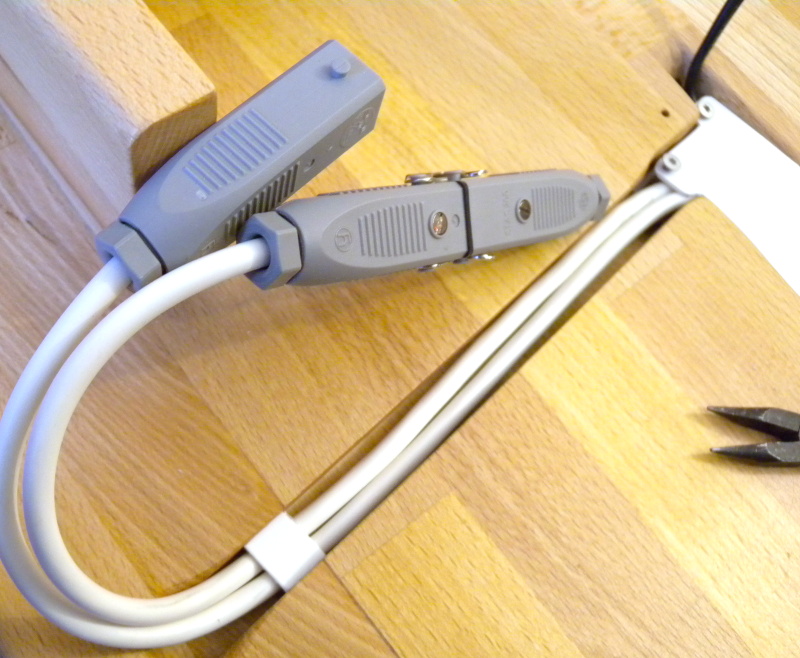 For the power cables, I used Hirschmann STA 20 connectors, which I like a lot, as
they are smaller than usual power connectors and they have a locking clip. There
is one cable for power in, and another for power out, so that I can use the power switch
in the table also to switch a lamp or something. We'll see.
For the power cables, I used Hirschmann STA 20 connectors, which I like a lot, as
they are smaller than usual power connectors and they have a locking clip. There
is one cable for power in, and another for power out, so that I can use the power switch
in the table also to switch a lamp or something. We'll see.
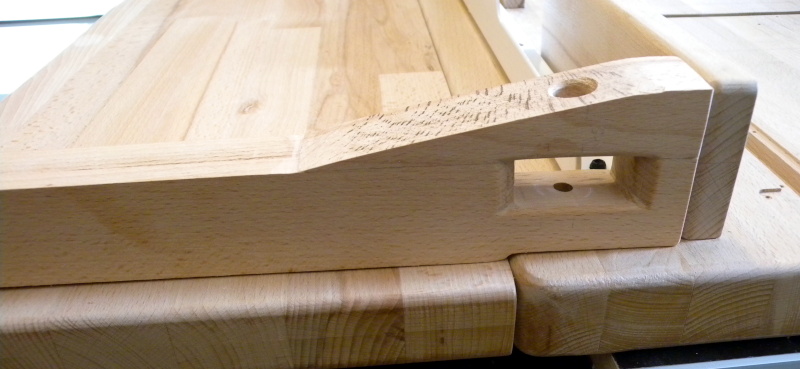
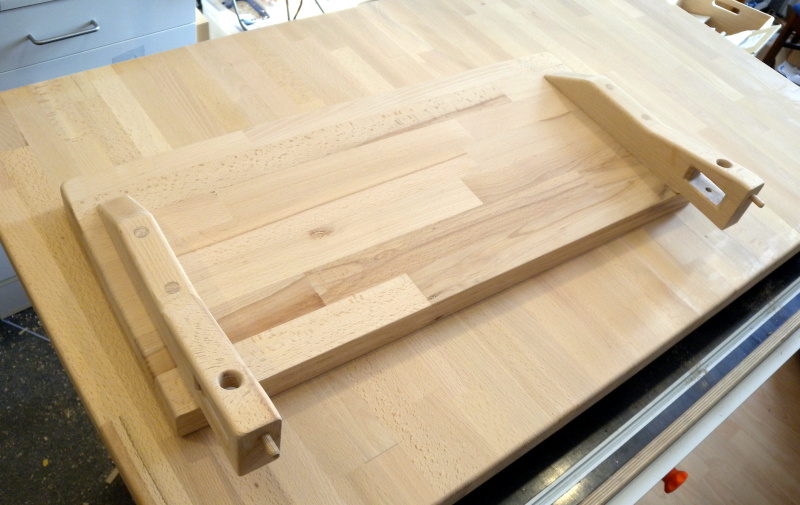
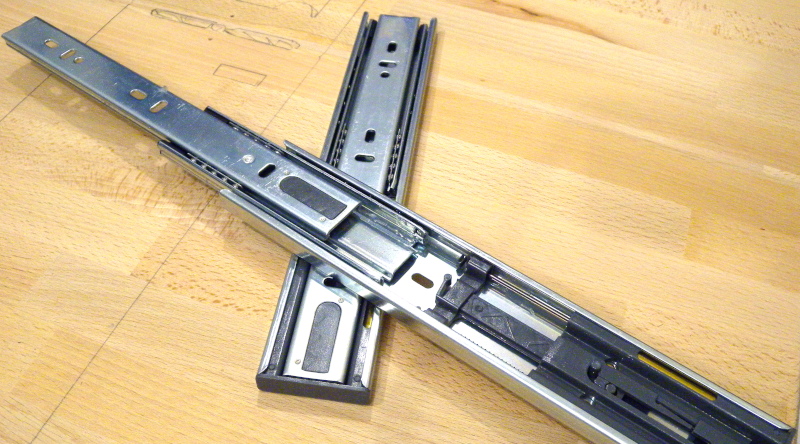 The drawers were kept simple. I used these drawer slides.
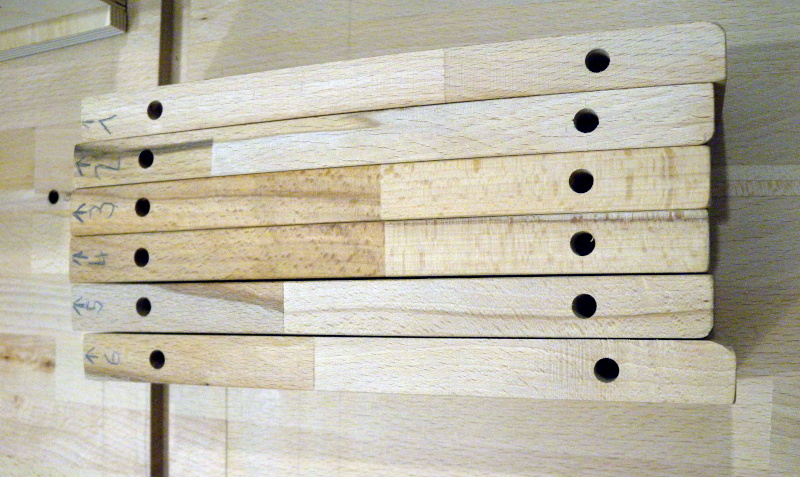 Six walls will hold the drawers.
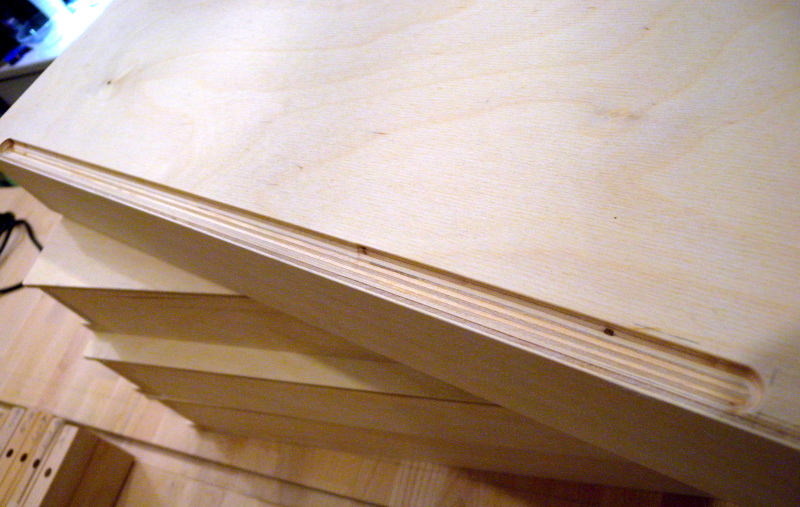 The drawers are constructed from plywood, with a groove at the front on the
bottom for pulling them out.
The drawers are constructed from plywood, with a groove at the front on the
bottom for pulling them out.
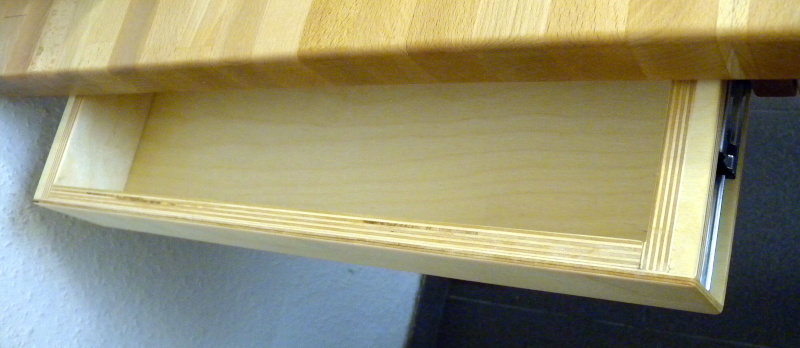 The drawers are only 23cm long inside because there's the table frame in the
middle. But they are about 45cm wide inside, so there is a bit of
space. To give more clearance for my legs, these drawers are kept shallow at
only 6,5cm total depth inside. I.e., there is 450x230x65mm³ of space in each
drawer.
The drawers are only 23cm long inside because there's the table frame in the
middle. But they are about 45cm wide inside, so there is a bit of
space. To give more clearance for my legs, these drawers are kept shallow at
only 6,5cm total depth inside. I.e., there is 450x230x65mm³ of space in each
drawer.
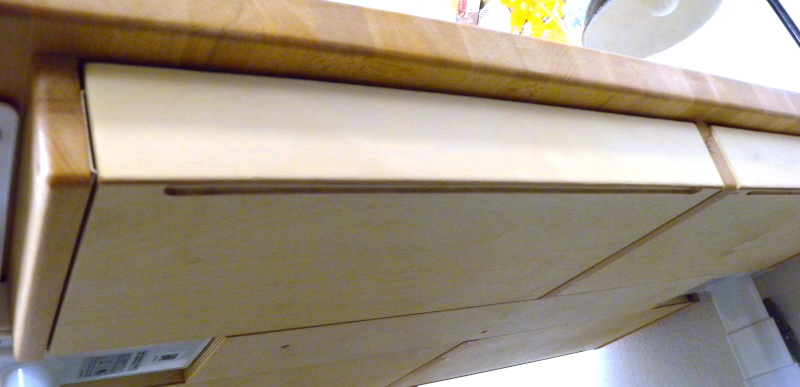 This is the bottom view of the assembled table.
 And of course, the complication does not end here. We wanted a table extension
to have space for six people when necessary. It was a bit tricky to fit a mounting
mechanism, because there is already so much stuff mounted unterneath. The
construction I ended up using is quite stable, though.
And of course, the complication does not end here. We wanted a table extension
to have space for six people when necessary. It was a bit tricky to fit a mounting
mechanism, because there is already so much stuff mounted unterneath. The
construction I ended up using is quite stable, though.
 The extension table is not yet completely finished, but I will have more photos
once it is done.
The extension table is not yet completely finished, but I will have more photos
once it is done.
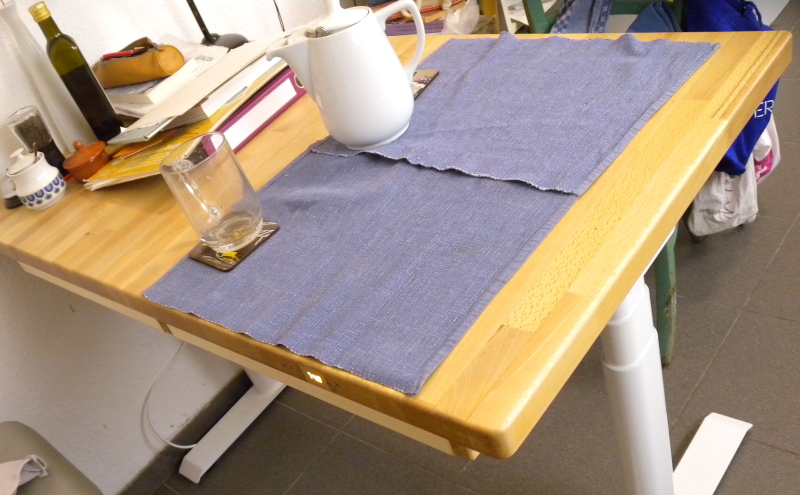 And this is the new table, already cluttered.