| « 2019-04-14 | Tinkering | 2019-01-25 » |
Tinkering: 2019-03-10: My Perfect Shoe Lacing: Henrik Lacing
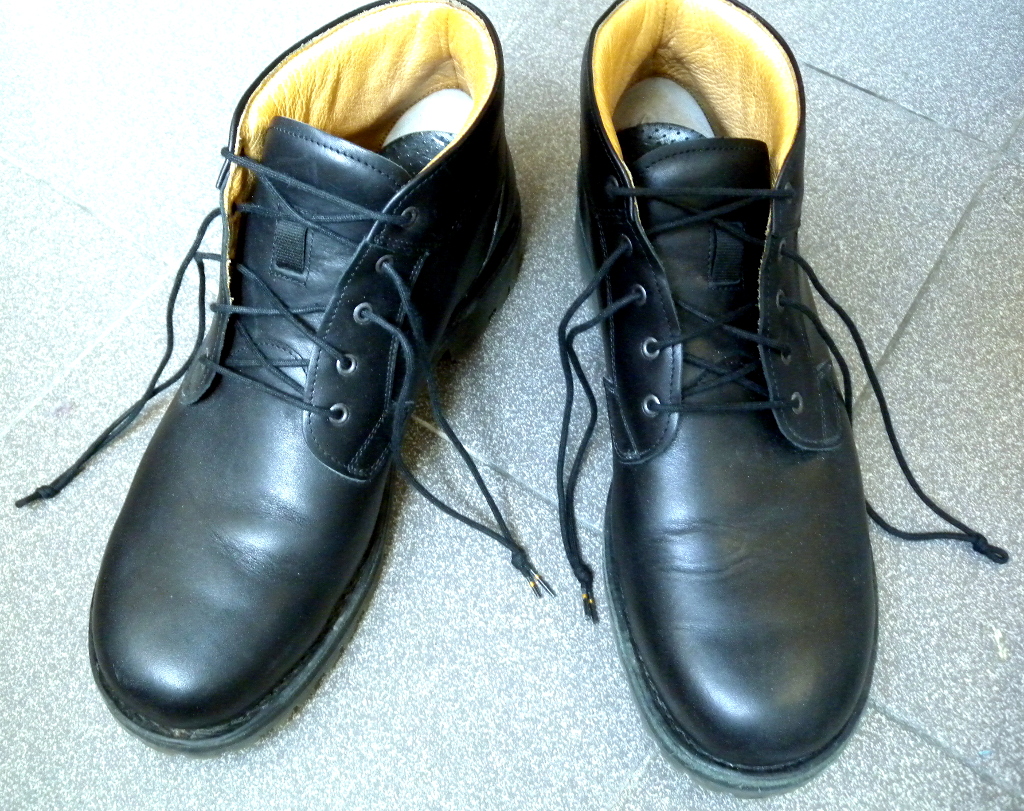
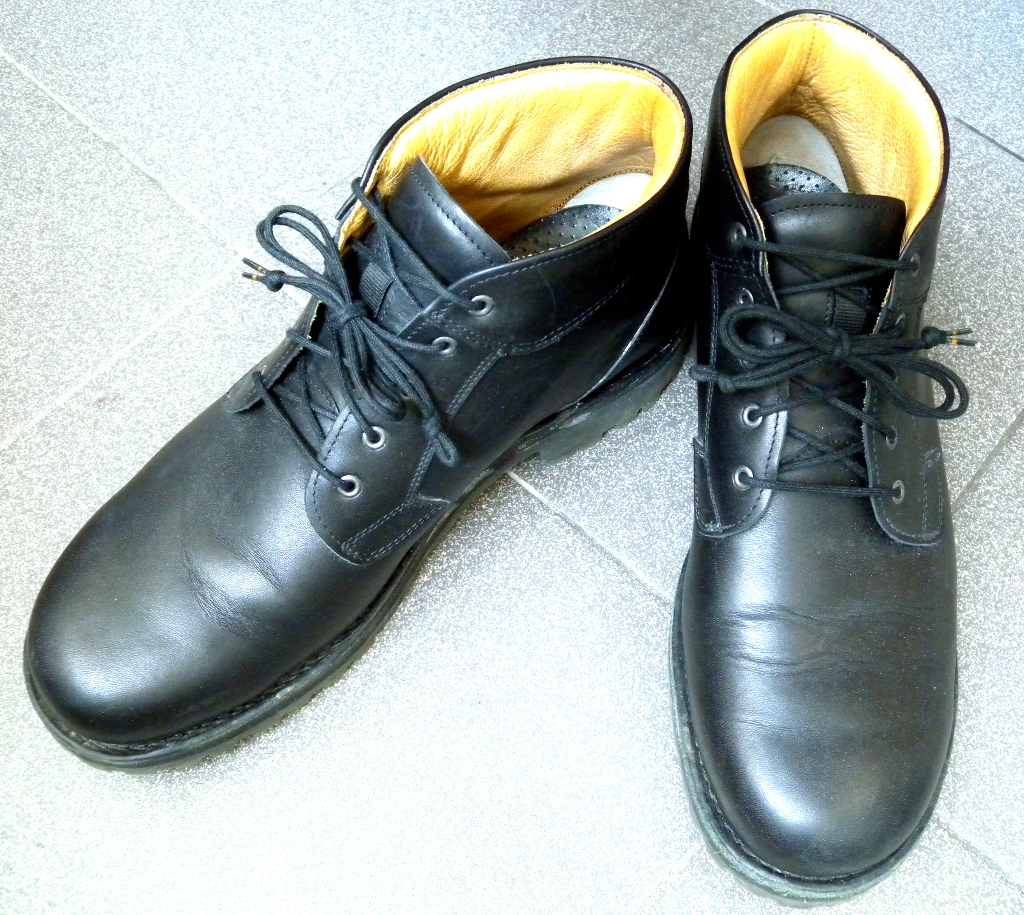
To be honest, I am not a friend of lacing my shoes. It is a frustrating thing to do and it takes too much time. Why not use velcro? For elegant shoes, however, it seems that laces are the only accepted option. Since I have a pair of elegant shoes, too, I occasionally need to lace shoes like any normal person. So for quite a while I have been looking for a way to improve the situation. I finally did it, and the result looks as follows on my black leather Geiger Tessin shoes.
But let's start by first stating the problem and then tying laces.
The Problem
The most annoying thing about lacing is that you cannot just pull the ends of the lace, make a knot, and you're done, because the lace in the lowest eyelets will not be tight. Experiments show that two pairs of eyelets are the maximum for simple one-pull tightening – beyond that, friction becomes too high and the lace will not move further. This means a tightening pass from bottom to top is necessary.
At some point, the shoes need to come off again. Again, the tightly laced shoes annoy me when I want my comfy slippers instead. I cannot just open the knot and pull to untighten the shoes, because friction is typically too high to quickly loosen the lace. Multi-stage pulling is necessary again before the shoe lets go of my foot.
To avoid this kind of pain, my plan was to find a better lacing method. Professor Shoelace has a lot of stuff, and I can highly recommend reading this to improve your quality of life. It's the small things that we do every day that, when properly optimised, make life easier. Whether you are annoyed by the effort of lacing shoes, or whether you do not like the look of a normal shoe lace, go check out that website.
The first step on my quest was to simply reduce friction by not using all the eyelets. My shoes have five pairs of eyelets and when only using three of them, friction is low enough for a normal lacing method to work OK (the lowest, third pair of eyelets tightens less easily, but it's still OK). This worked, but the shoe looks unbalanced. All in all, this method had a low spouse acceptance factor. I was accused of damaging my shoes.
Corset Lacing
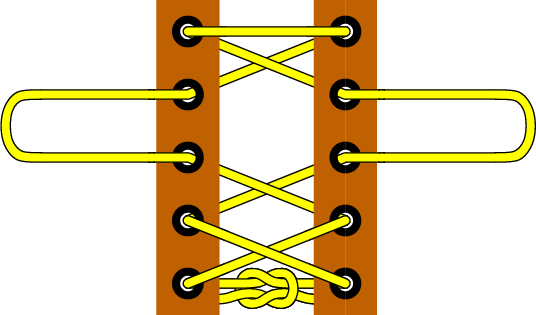
Last week, I came back to finally solving this, and I had planned to start at Corset Lacing, because when tightening, this method allows me to pull on four ends of the lace instead of only two, because the knot is not at the top, but in between two middle pairs of eyelets. With five pairs of eyelets on my Geiger shoes, this should allow me to tighten the whole shoe at once. The technique will work up to six pairs of eyelets according to my experiments with friction.
I used the following lacing pattern:
This indeed solves my basic problems:
- Even and Strong Tightening:: Tightening works evenly and tightly with a single pull on the looped ends.
- Easy Opening: When untying the lace, the shoe opens easily and completely, so I can quickly get out of my shoes.
- No Escaping End: When loosening the lace fully, the ends of the lace cannot be pulled through the eyelets, because the tightening end is really a loop. Otherwise this would require rewiring the lace through the eyelets, again testing my patience.
This lacing technique is much better than the normal method. I am on the right path!
One problem with Corset Lacing is that the standard shoe lace knot is made with two loops instead of two ends of the lace, and this causes the tied knot to have three loops on each side, which makes it impossible to see which one to pull to untie the knot:
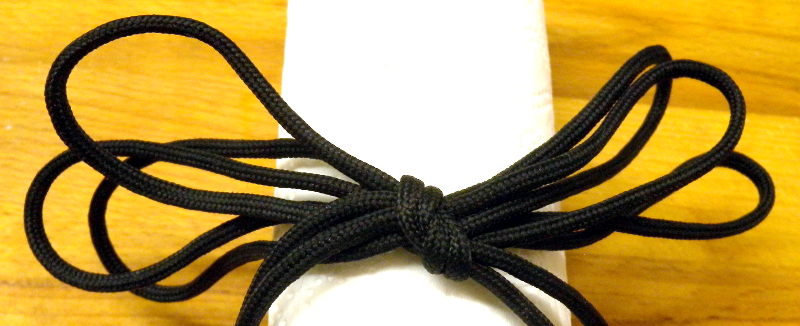
So there is more to improve, both functionally and visually.
Henrik Lacing
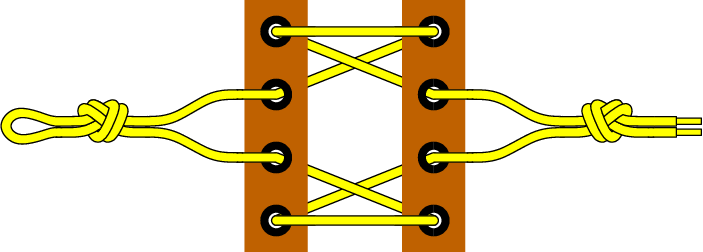
Corset Lacing is a big step forward. But with more experiments, I was able to improve it further, and the result is what I modestly call 'Henrik Lacing':
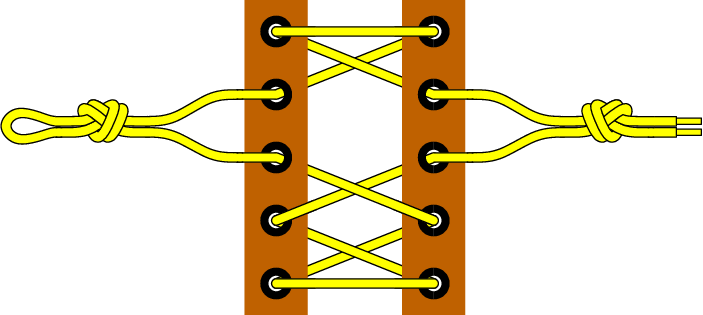
The important functional difference of Henrik Lacing compared to Corset Lacing is moving the connecting knot from the bottom to the side, replacing one of the tightening loops.
Furthermore, the other tightening loop is symmetrically knotted to form a noose. These knots at the end of the loops indicate where to pull the lace, both for tying and untying.
Additional to what Corset Lacing can do, this method has the following advantages.
- Automatic Centering: When pulled evenly, the knotted ends center the lace, i.e., the ends will have the same length. There is no annoying situation when after tightening, one end is longer than the other one. This situation would otherwise require adjusting the length of the ends by pulling the lace in several places and re-tightening. Not so with this technique: it auto-centers. Note that the Corset Lacing does not do this because the positions where to pull are not marked, so there is a good chance of unevenly distributing the lace when pulling on the loops. This is made worse by the bottom knot, which prevents the lace from adjusting left or right.
- Obvious Untying: The three loops problem of the shoe lace knot of Corset Lacing is avoided: adding knots on both tightening loops shows where to pull to untie.
I suppose with this lacing method, normal lacing will annoy me even more.
The other differences between Henrik Lacing and Corset Lacing are for visual reasons. Firstly, moving the connecting knot to the side makes the bottom cleaner, because there is just a single string.
The Corset Lacing uses Over Under Lacing both above and below the tightening loops. With three eyelets below the loops on my shoe, this would cause the bottom most string to be in the back. I want it in front, however, because I think it looks cleaner. So I use one Criss-Cross Step to swap front and back. This causes slightly higher friction, but I found it to be negligeable. The X shapes of the final lacing are still nice.
A word about knots: the bottom knot of Corset Lacing is typically a reef knot, which is shown in the picture above. A more secure knot can be used, of course, but discussing this is outside the scope of this article.
The knots on the ends of Henrik Lacing are shown here as simple overhand loops. This is secure, but sailors may use whatever they prefer.
The main knot in the following picture of my shoes is a standard shoelace knot. I think more sophisticated knots get heavyweight very easily with this lacing method, because of the double strings of the loops that are tied together. All in all, I think the final result is quite nice.
For this lacing method, I needed longer shoe laces. Originally, I had 110cm laces, and I had to replace them with 150cm laces. I used thinner laces by accident (the shop did not have exactly the original ones), but it turned out to be good, because the main knot might have become too heavyweight otherwise.
Other Numbers of Eyelets
Although I only tried it with five pairs of eyelets, I think the Henrik Lacing method is suited well for four, five, and six pairs of eyelets. Here's what it looks like for four and six pairs:
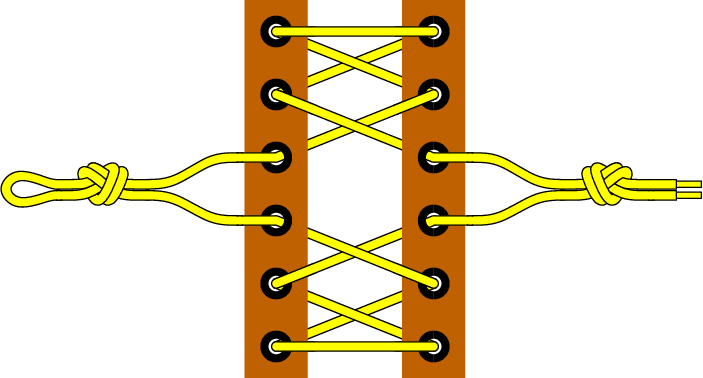
For new shoes, I'll experiment again in the future instead of just accepting what the shows come with. Because life is easier now.