| « 2026-01-10 | Tinkering | 2025-11-02 » |
Tinkering: 2025-11-23: Simon #4 Shirt
 This is my eleventh shirt, numbered 4, the fifth one that survives, the first shirt not
classified as a test.
This is my eleventh shirt, numbered 4, the fifth one that survives, the first shirt not
classified as a test.
 This shirt uses essentially the same pattern as the
previous shirt 3.8. It is a bit optimised, though:
the tips of the collar stand are tilted up by 8mm now, to make it sit
right. I can now close the top button without a weird fold in the
button placket. However, I will probably wear this with the top
button open most of the time.
This shirt uses essentially the same pattern as the
previous shirt 3.8. It is a bit optimised, though:
the tips of the collar stand are tilted up by 8mm now, to make it sit
right. I can now close the top button without a weird fold in the
button placket. However, I will probably wear this with the top
button open most of the time.
Another small pattern change is the neck hole, which was redrawn to make it smoother. This removes a few wrinkles from the shoulder seam (hidden by the collar, but anyway...).
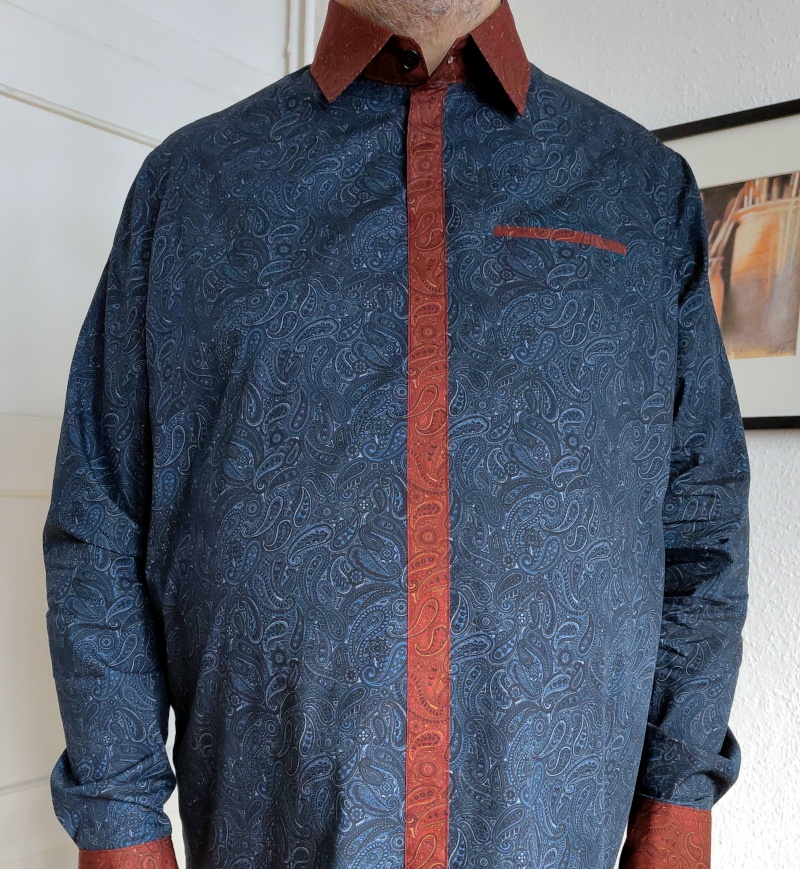
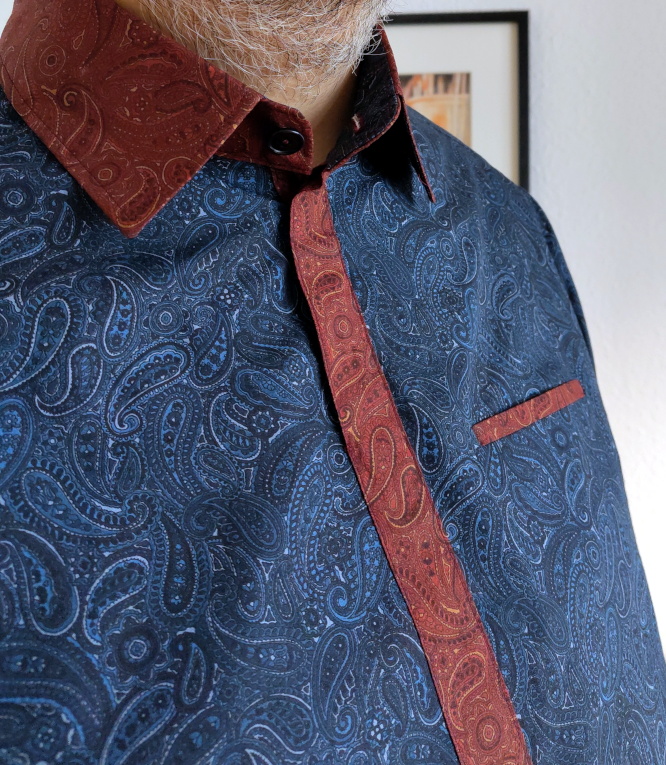
 The style of this shirt is a little different than the previous one:
this has no front yoke, has a welt pocket instead of an in-seam pocket,
and it has a collar. The button placket is now concealed, which could
not be done with the previous thick fabric.
The style of this shirt is a little different than the previous one:
this has no front yoke, has a welt pocket instead of an in-seam pocket,
and it has a collar. The button placket is now concealed, which could
not be done with the previous thick fabric.
This is still no button-down shirt, but has a fake button placket for decoration, and a concealed button placket at the top for two buttons.
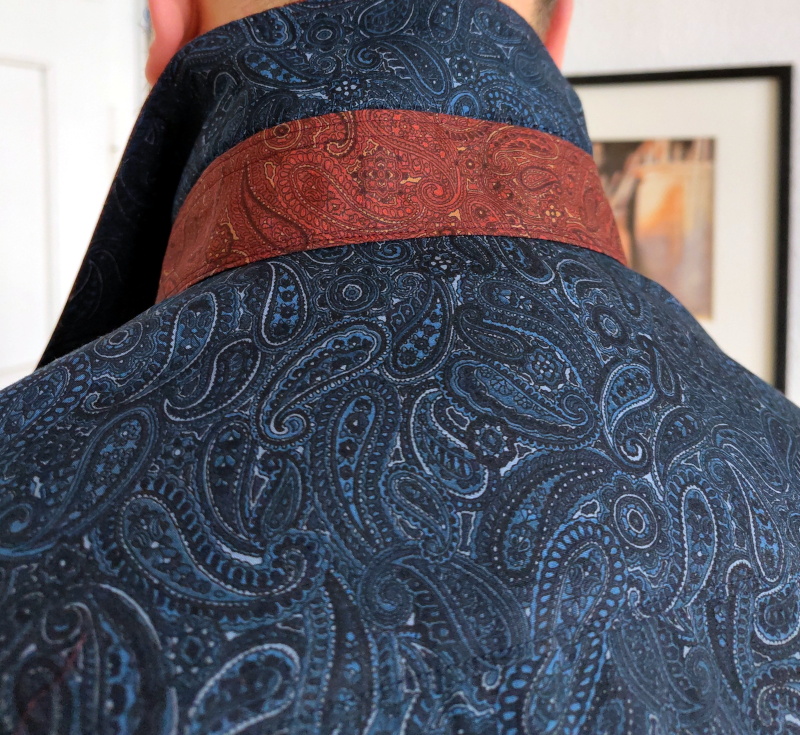
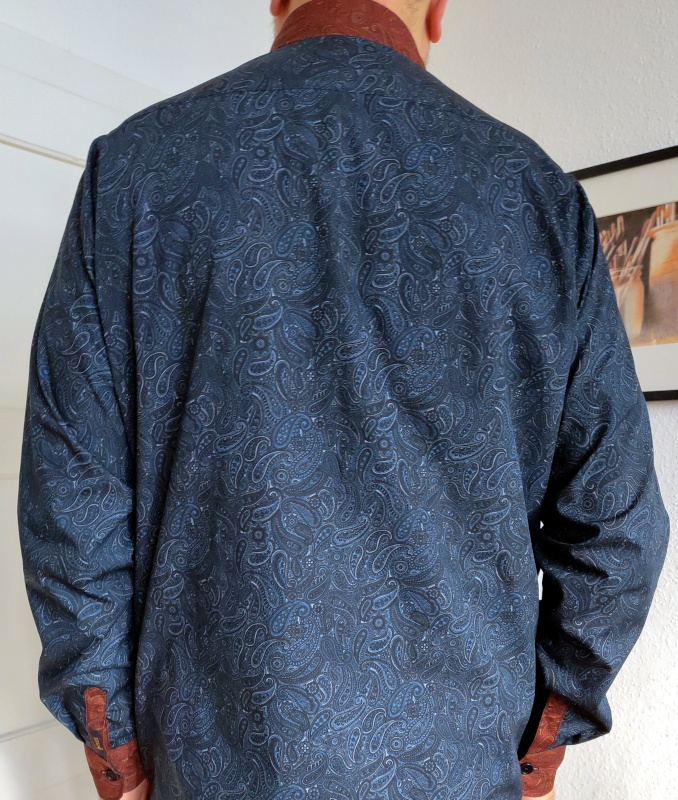 The back of the shirt looks like a good fit, too. I am very happy with
the outcome of the series of test shirts.
The back of the shirt looks like a good fit, too. I am very happy with
the outcome of the series of test shirts.
 There are two fabrics used for this, a red and a blue one, which are essentially the
same otherwise, with the same pattern. I wanted to make the pattern
match up wherever possible, so I spent a lot of time on the button placket, the welt
pocket, and the sleeve plackets.
There are two fabrics used for this, a red and a blue one, which are essentially the
same otherwise, with the same pattern. I wanted to make the pattern
match up wherever possible, so I spent a lot of time on the button placket, the welt
pocket, and the sleeve plackets.
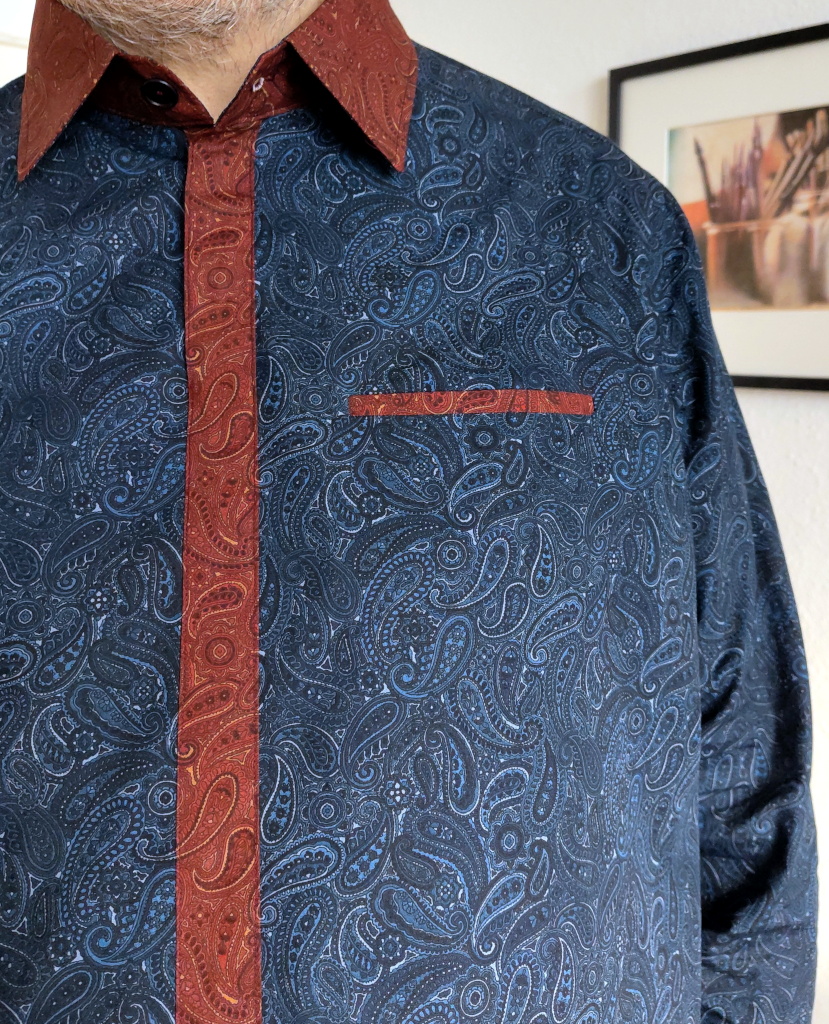
The fabric alignment took a lot of time. I doubt I would have liked to pay a taylor for this. The welt pocket alone took eight hours to get right, because I wanted such a precision. I used paper masking tape to align the fabric before doing the critical stitches.
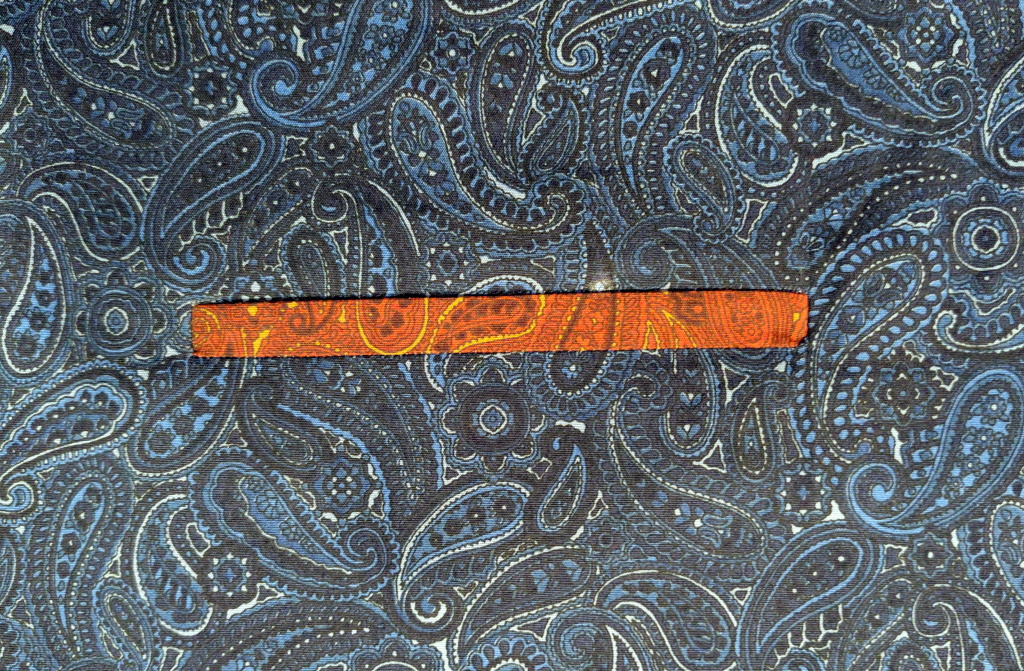 The welt pocket is one of the most confusing examples, I think – it
looks almost like a rectangular filter is applied to the fabric. The effect
is so pronounced, I think, because the welt pocket has no visible seams –
all the stitches are on the inside.
The welt pocket is one of the most confusing examples, I think – it
looks almost like a rectangular filter is applied to the fabric. The effect
is so pronounced, I think, because the welt pocket has no visible seams –
all the stitches are on the inside.
The inner pocket fabric also matches up, although this is not visible, because it's inside of the pocket – but I know it's there! Well, if you looked into the pocket, you'd see that the fabric pattern continues.
This was also my first welt pocket, and there is room for improving my technique. I will need to increase the start/end accuracy of the top and bottom welt seams next time – despite working eight hours on the pocket, these seams are a bit sloppy, and the pocket is a bit crooked in the corners, because the top and bottom seams of the pocket do not start and end perfectly vertically aligned. I am still learning where to apply precision and where pragmatism is OK...
 Generally, the details that are normally visible use the red fabric, while details
that are normally hidden use the blue fabric. At the collar, this means that red
and blue alternate.
Generally, the details that are normally visible use the red fabric, while details
that are normally hidden use the blue fabric. At the collar, this means that red
and blue alternate.
With a fabric pattern like this, there is a danger to accidentally get half-aligned patterns, which will look like they could be aligned better. So wherever fabric cannot be aligned perfectly, I tried to make sure that there is no accidental near-alignment either – the eye is very good at constructing these.
This is why the fabric of the collar is rotated by 90 degrees wrt. the yoke. And the collar vs. collar stand direction of the fabric is reversed.
Another danger zone is the yoke to back seam, which cannot be aligned perfectly, because the back is slightly curved. Here, again, the fabric direction is reversed to avoid accidental near-alignment.
Let's imagine that the paisley pattern direction is the dominant swimming direction of the amoebae. Then in the back, the amoebae swim down, in the yoke, in the front, and in the sleeves, they swim up. And in the collar and cuffs, they swim sideways. And in the collar stand vs. collar, they swim opposite directions (left-to-right vs. right-to-left), both when the collar is folded up and when folded down (it's four pieces of fabric).
Yes, it's overdone, but it was fun.
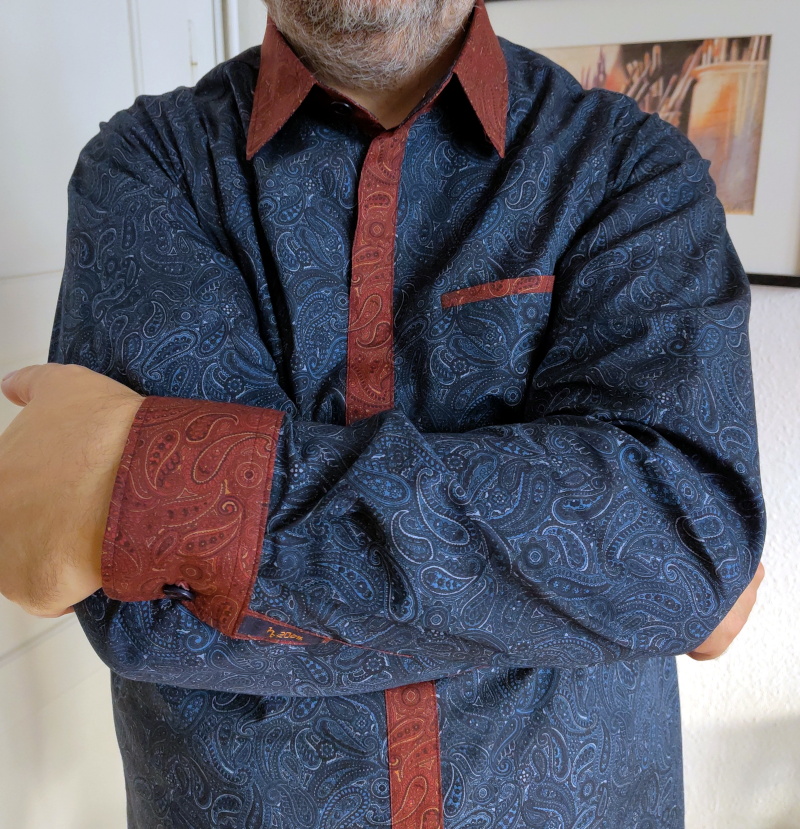
 The back pleats are accidentally moved outward another 1cm compared to the
previous shirt. I had made a mistake in my measurements... In the end,
the pleats look great, I think, as they blend in with the sleeve folds.
I am not sure whether this or the previous pleat location is my favorite.
The back pleats are accidentally moved outward another 1cm compared to the
previous shirt. I had made a mistake in my measurements... In the end,
the pleats look great, I think, as they blend in with the sleeve folds.
I am not sure whether this or the previous pleat location is my favorite.
 The pleats work very well to ease arm movement.
 The space on the back is needed when I do this.
![]() These are the cuffs and the sleeves with their plackets, which are
also pattern aligned, but then one of them has my logo, hiding most of
the alignment.
These are the cuffs and the sleeves with their plackets, which are
also pattern aligned, but then one of them has my logo, hiding most of
the alignment.
![]() It took around four hours per sleeve to align these plackets, and I
had to use a different technique to be able to align these (and the
same with the button placket), because they are normally sewn in from
the back side with very little chance to put them exactly in the right
spot before stitching. So instead, I pre-stitched around the rectangle
of the fabric slit to secure the fabric for the cut, then cut the fabric,
and then attached the folded plackets from the front side.
It took around four hours per sleeve to align these plackets, and I
had to use a different technique to be able to align these (and the
same with the button placket), because they are normally sewn in from
the back side with very little chance to put them exactly in the right
spot before stitching. So instead, I pre-stitched around the rectangle
of the fabric slit to secure the fabric for the cut, then cut the fabric,
and then attached the folded plackets from the front side.
Both the upper and lower part of the plackets are aligned, which is, again, a little bit overdone, maybe.
And then half of the carefully aligned placket is now hidden with the logo. :-)
 To avoid plastic in the shirt, I again substituted glue-on interfacing
with pieces of an old cushion cover fabric, which is linnen. Because it's
not glued, it needs to be sewn in, so there are a few additional seams in
the cuffs and the collar stand. This one is reassembled, as I had to
recut the collar stand, so you can see the stitch holes in the interfacing
where it was and will be sewn to the fabric.
To avoid plastic in the shirt, I again substituted glue-on interfacing
with pieces of an old cushion cover fabric, which is linnen. Because it's
not glued, it needs to be sewn in, so there are a few additional seams in
the cuffs and the collar stand. This one is reassembled, as I had to
recut the collar stand, so you can see the stitch holes in the interfacing
where it was and will be sewn to the fabric.
Also, I marked the shirt with my own blood that I spill often when working with needles...