| « 2025-08-10 | Tinkering | 2024-04-06 » |
Tinkering: 2025-08-08: Shirt
 For a couple of years, I've been unable to find nice shirts. I had bought a few
from Signum where the fit was OK, and I really liked colours and patterns and design.
Then they went out of business, and I still wear the shirts today – until they
fade and fall apart.
For a couple of years, I've been unable to find nice shirts. I had bought a few
from Signum where the fit was OK, and I really liked colours and patterns and design.
Then they went out of business, and I still wear the shirts today – until they
fade and fall apart.
My plan was to start sewing at some point in time. In the meantime, I also had a tailor make a bespoke shirt for me, which is one of my best ones. But still, the plan remained to start sewing.
The local maker space 'Offene Werkstatt Mainz' has a sewing group, and I attended a few workshops, then watched several videos on a well-known website, in particular a shirt making class presented by Doris and Su from Berufskolleg Humboldtstraße Köln. And then a very good advice came from a fellow maker, to check out freesewing.eu, which is truly amazing. In their forum, there were several recommendations of David Coffin's book 'Shirtmaking: Developing Skills for Fine Sewing', so I also got that book. And a few weeks later, here is my first 'Simon' shirt. A big thanks to all of you for helping me!
With a new hobby comes a new language, and I learned a lot of new words, both in English and in German. Here's an incomplete list, also for my future self as a dictionary.
| English | Deutsch |
|---|---|
| to sew | nähen (allgemein) |
| to stitch | sticken, steppen, nähen, Stiche machen |
| to embroider | sticken |
| to baste | heften, reihen |
| seam | Naht |
| seam allowance | Nahtzugabe |
| flat-felled seam | Kappnaht |
| yoke | Passe |
| sleeve | Ärmel |
| sleeve placket | Ärmelschlitz, Dachschlitz, Schlitzbeleg |
| cuff | Manschette |
| hem | Saum |
| to hem | säumen |
| collar | Kragen |
| collar stand | Kragensteg |
| dart | Abnäher |
| pleat | Falte |
| crease | Bügelfalte |
| box pleat | Kellerfalte |
| thread | Faden, Nähgarn |
| fabric | Stoff |
| facing | Beleg |
| interfacing | Einlage, Bügeleinlage |
| lining | Futter |
| bobbin | Unterfadenspule |
| placket | Blende, Leiste |
| embroidery | Stickerei |
| miter | Gehrung |
| mitered corner | Briefecke |
| to serge | ketteln |
| serger | Overlock-Maschine |
| notch | Knips |
| armscye | Armloch, Armöffnung |
| to fell | staffieren |
| to hand-fell | von Hand staffieren |
And an honorary mention goes to Dutch with has 'draad' for 'thread', which is kinda funny for me as German 'Draht' is 'wire'. And then I realise that English 'thread' is actually the same word, which never felt funny to me at all. Hmm... OK, it's all Germanic languages...
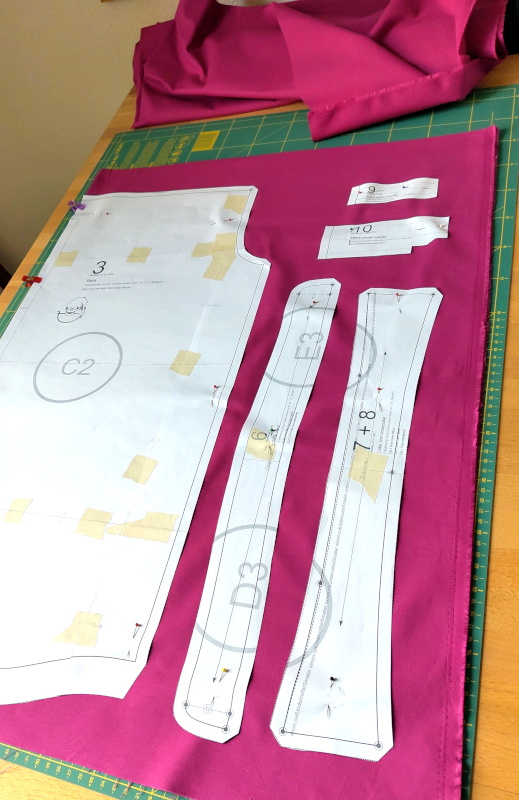
Anyway, I started to use Freesewing's online tool to instantiate a 'Simon' shirt, then compared measurements to a couple of good shirts I have, then printed the pattern, and then cut out the fabric.
And I also bought a sewing machine and a few other tools and supplies.
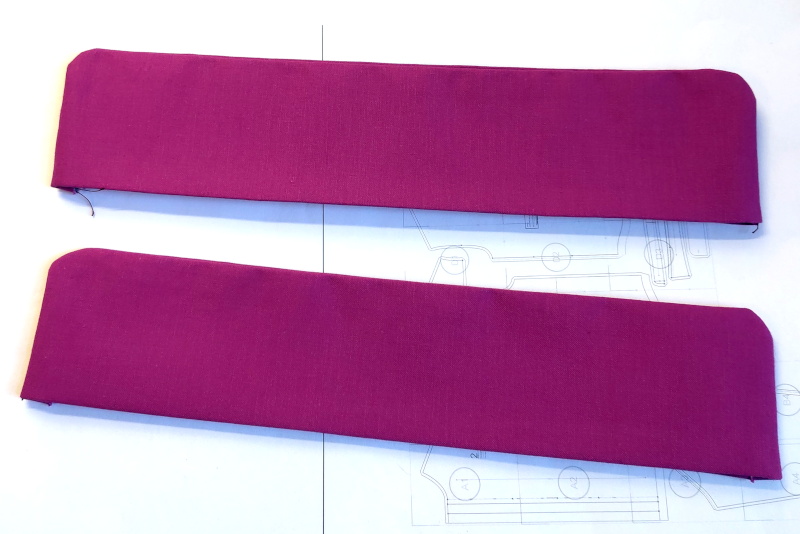 The cuffs were the first thing to do. They came out surprisingly straight.
For the next shirt, though, I will do them slightly differently to avoid some stress when attaching the sleeves. More on that in a different article (with photos).
 The collar came out good, too.
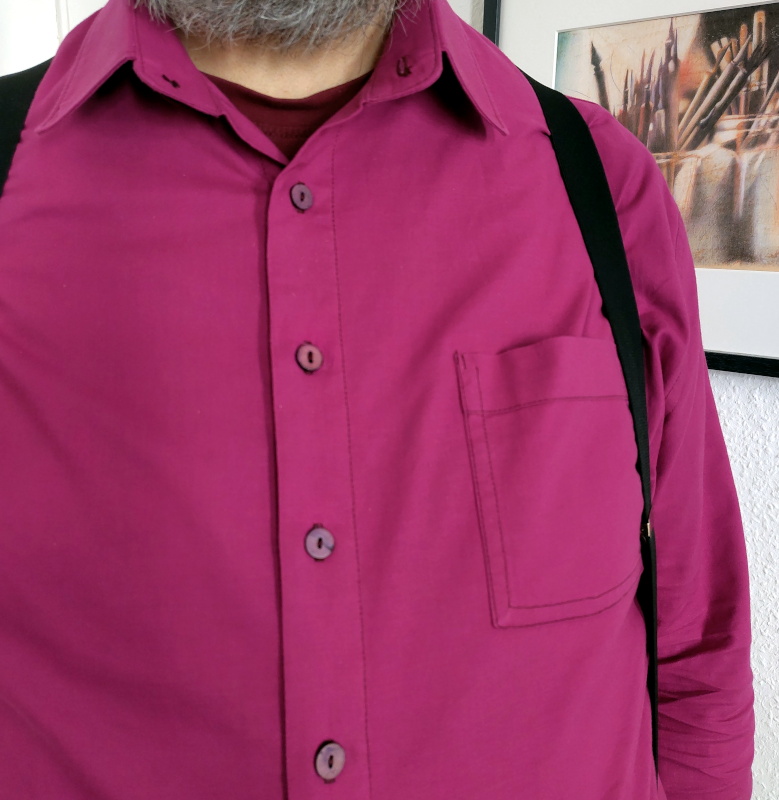
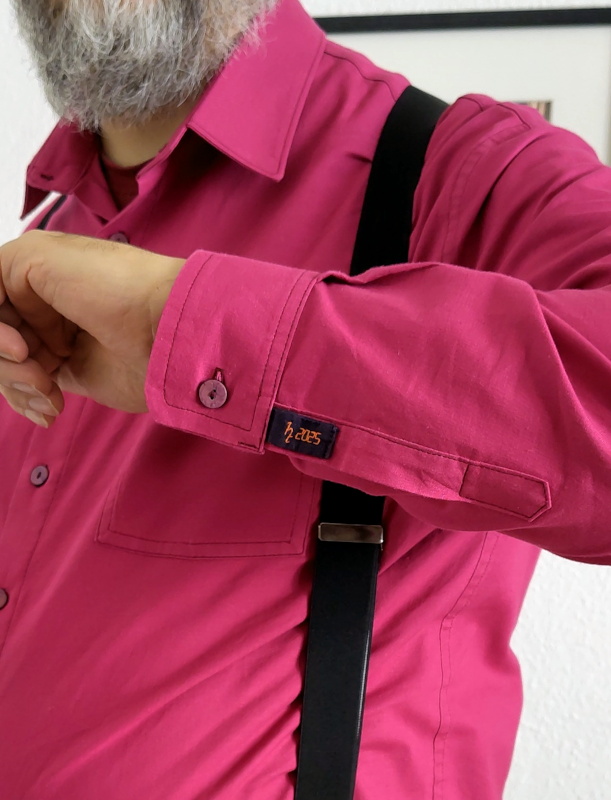
 And here's the final shirt on me.
My belly was not supported out of the box for the Simon shirt. The first attempts at setting up the pattern looked weird. But I found that all my shirts that fit me OK have a straight side-seam, i.e., hip, waist, and chest measurements are the same. I set up the Simon shirt like that (using the largest of the three measurements), and the fit is surprisingly OK for a first try, I think.
You can also see here that I added a chest pocket, which is too far out from the center and it interferes with the suspenders – another thing to fix on my list for the next shirt.
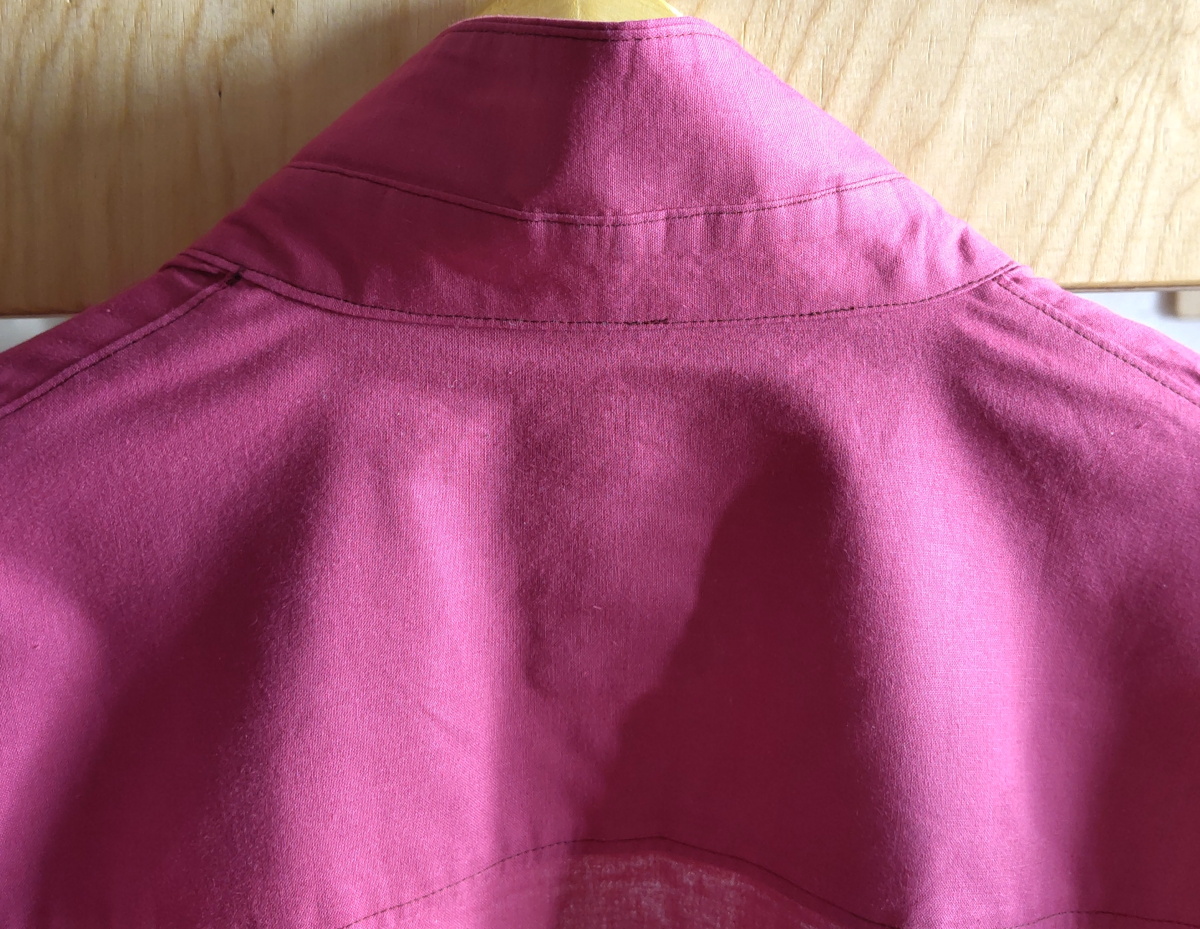
 The rear is also quite OK. The back piece is rounded at the yoke to add
a few millimeters in the center to follow the back. My bespoke
shirt has this feature, and it fits best.
The rear is also quite OK. The back piece is rounded at the yoke to add
a few millimeters in the center to follow the back. My bespoke
shirt has this feature, and it fits best.
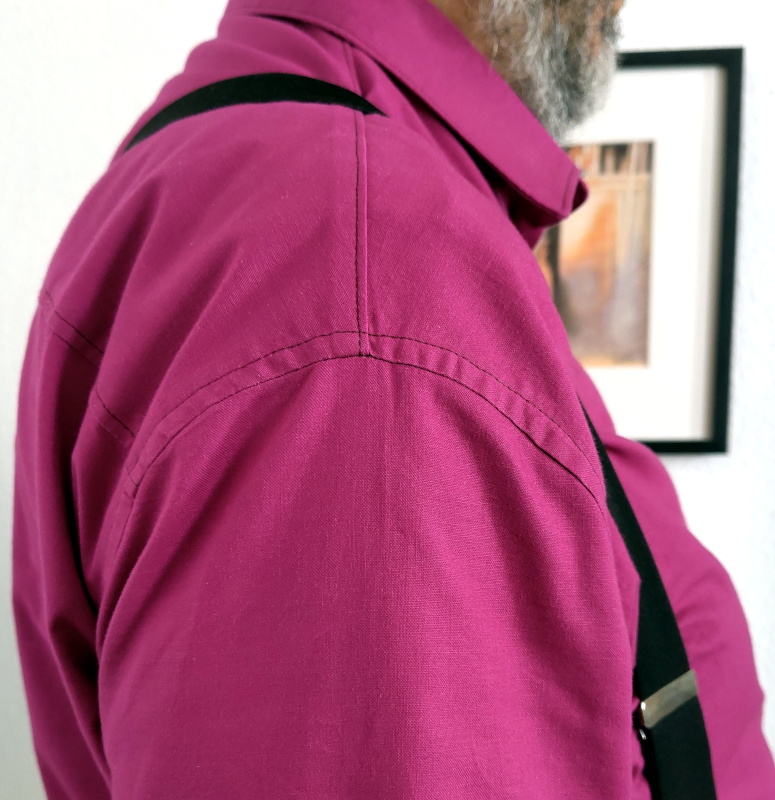 The shoulder seam for the sleeve is too low, and it will be moved
up for the next shirt. I did compare the distances and widths with
other shirts before printing the patterns, but something must have
gone wrong here.
The shoulder seam for the sleeve is too low, and it will be moved
up for the next shirt. I did compare the distances and widths with
other shirts before printing the patterns, but something must have
gone wrong here.
Also, there is more tension on the center of the sleeve, as if it's too short. I don't know exactly why, but we'll deal with that once the shoulder seam is OK – so earliest maybe in shirt No. 3, otherwise I wouldn't know which setting is to blame in case it is still wrong.
 Back to the pocket. It interferes with the suspenders.
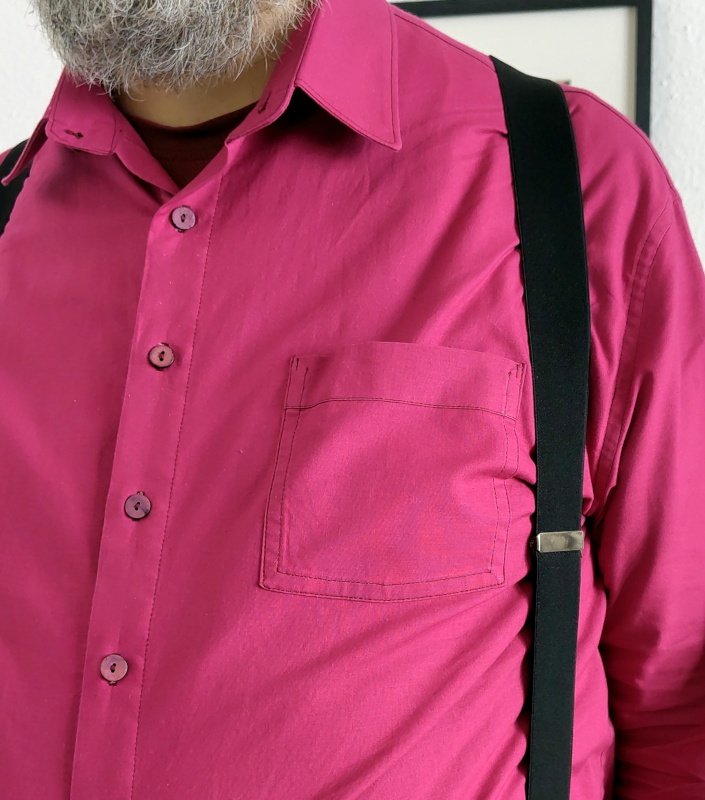 I can pull it out a little, but then the suspenders are in the wrong place.
But the front at the collar seems to be good. And the buttons are OK.
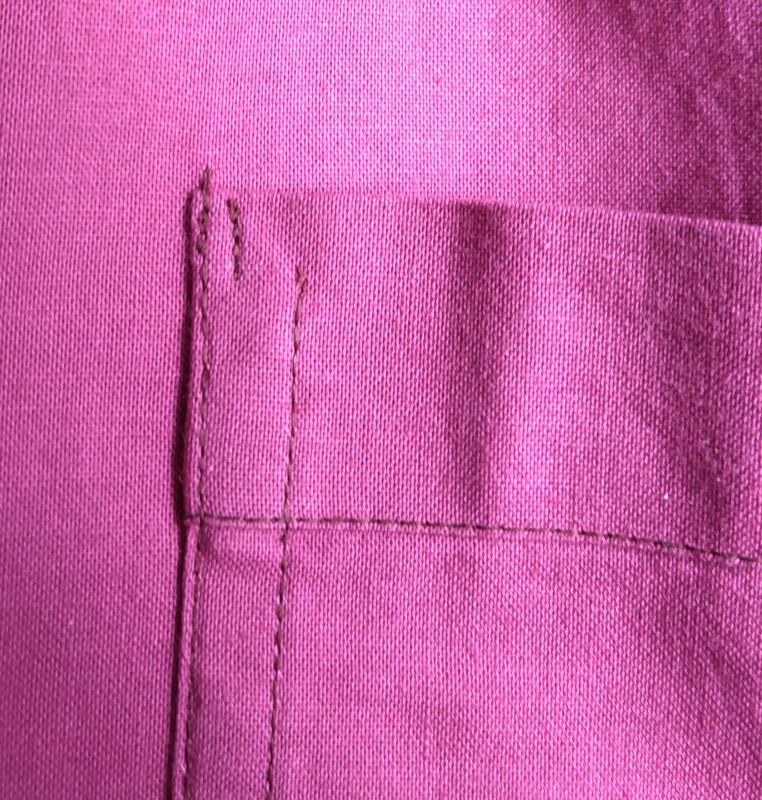 The sewing machine did one step more than I would have wanted, so the
seam that secures the pocket is one stitch too long. I was extremely
careful here, but the machine took two steps, not one. This was a
computer controlled sewing machine. A CNC machine. With a manual one,
this would not have happened, I would have had more control.
This machine was in my way.
The sewing machine did one step more than I would have wanted, so the
seam that secures the pocket is one stitch too long. I was extremely
careful here, but the machine took two steps, not one. This was a
computer controlled sewing machine. A CNC machine. With a manual one,
this would not have happened, I would have had more control.
This machine was in my way.
I decided that the sewing machine was inaccurate (or let's call it 'broken'), and poorly programmed, and/or the software was not tested well enough. I took the machine back and exchanged it for a different one, which was not broken. It is not always the beginner's fault.
But I left this and did not redo that seam though. It's kinda OK. This shirt is for practising and learning, and there are way worse crimes in it, which were actually my fault.
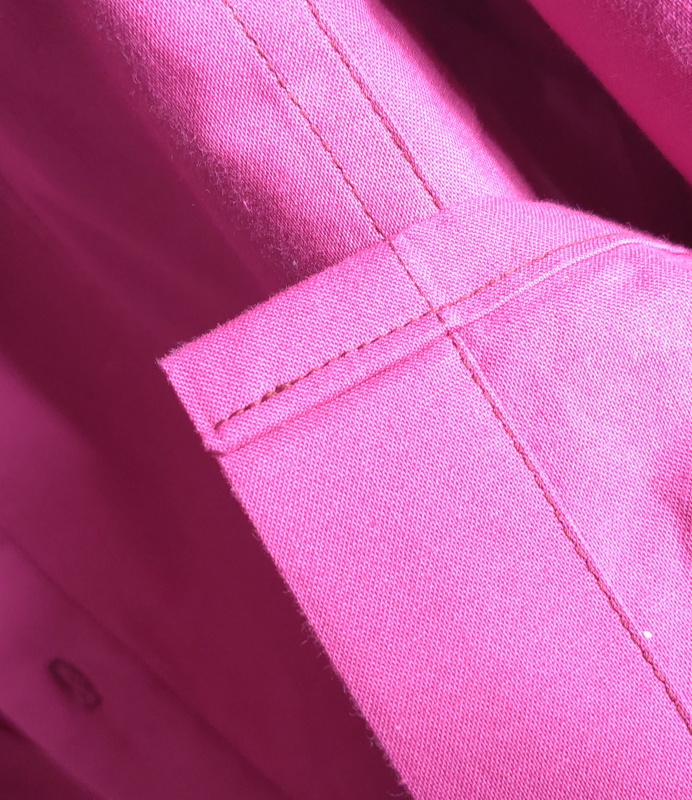
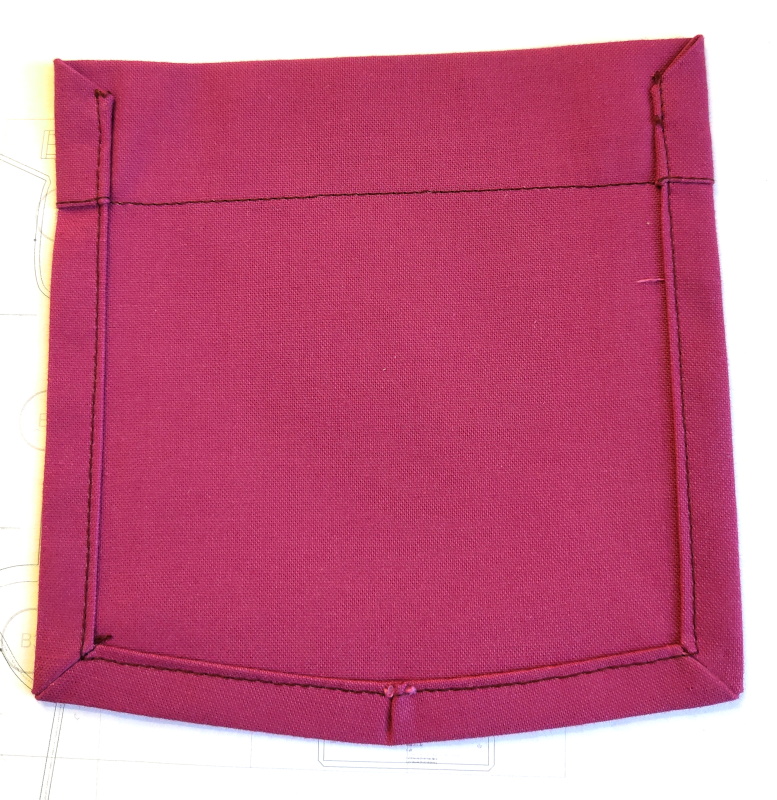 I kinda obsessed about the pocket and made it neat on the inside, too.
Notice particularly the miter seams in the bottom corners – it's not difficult to do, so I practised them here (also by folding and cutting a lot of paper), and I will employ this to other parts of the shirt for the next shirt.
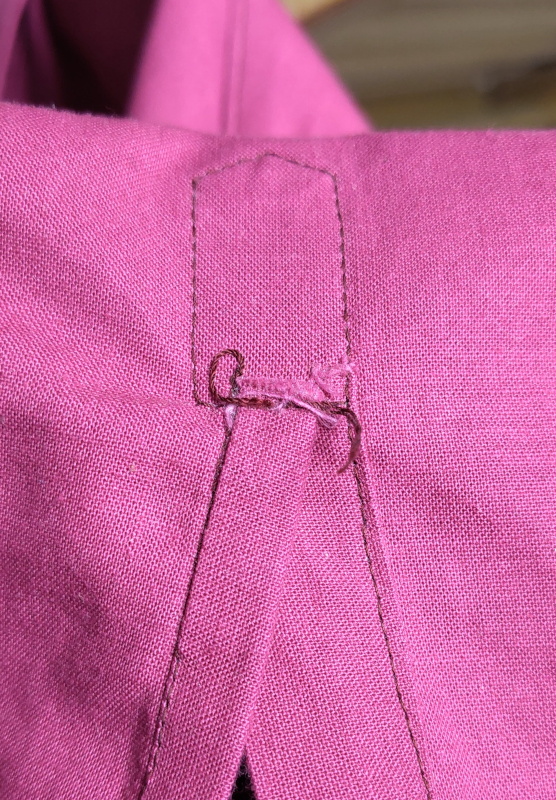
 This is the back side of the corner of the hem and the button placket.
This is not normally visible, and it is already quite neat. But I will
try to make this a mitered corner seam next time.
This is the back side of the corner of the hem and the button placket.
This is not normally visible, and it is already quite neat. But I will
try to make this a mitered corner seam next time.
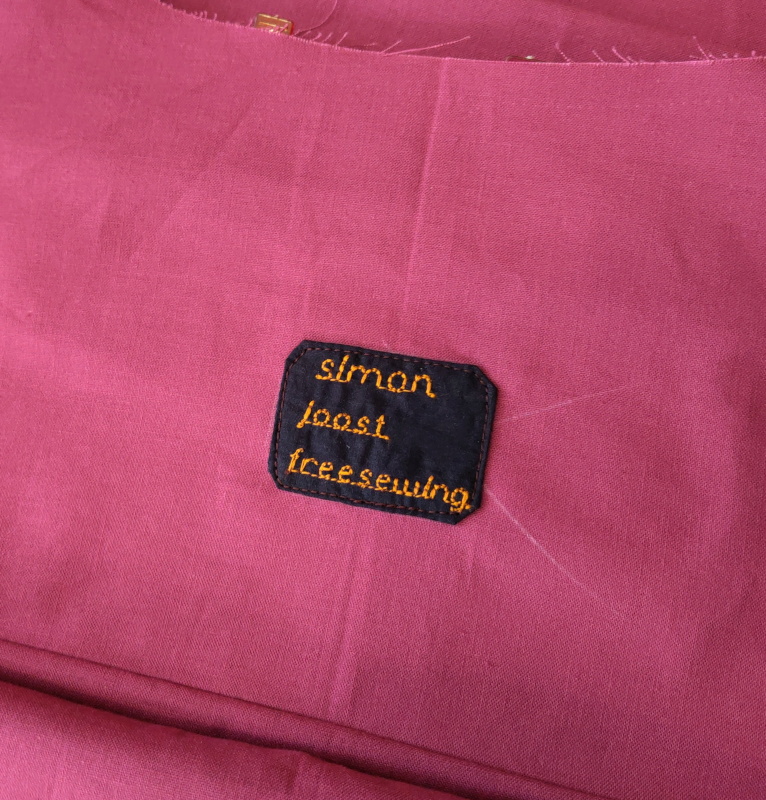 The CNC sewing machine can stitch text, so I needed to exploit that.
I had it stitch this tag for the
inner yoke. But the fonts are so ugly. But it's invisible, and I did not
want to spend too much time on this invisible detail, so I kept it. I did
want a tag.
The CNC sewing machine can stitch text, so I needed to exploit that.
I had it stitch this tag for the
inner yoke. But the fonts are so ugly. But it's invisible, and I did not
want to spend too much time on this invisible detail, so I kept it. I did
want a tag.
And if you think that 'w' is ugly – you are not right! Because that is not the ugly 'w'. The 'w' was so ugly that I replaced it with a Cyrillic 'ш', which turned out less ugly, but still ugly.
I already mentioned that that sewing machine was replaced. The new one has different ugly fonts.
 Here's a nice tag! It is visible and I hand-stitched it. Yes. Embroidery!
A maker wanted to sign his work.
 Here's one of the very few parts that I do not like in the Simon shirt design:
the sleeve placket. Its back side (inside the sleeve – it's invisible unless you
roll up the sleeves) is a bit of a crime.
Here's one of the very few parts that I do not like in the Simon shirt design:
the sleeve placket. Its back side (inside the sleeve – it's invisible unless you
roll up the sleeves) is a bit of a crime.
My plan is to replace this with a sleeve placket from Coffin's book on shirt making. Another thing on the list.
 This is my hand-stitched embroidery signing tag again.
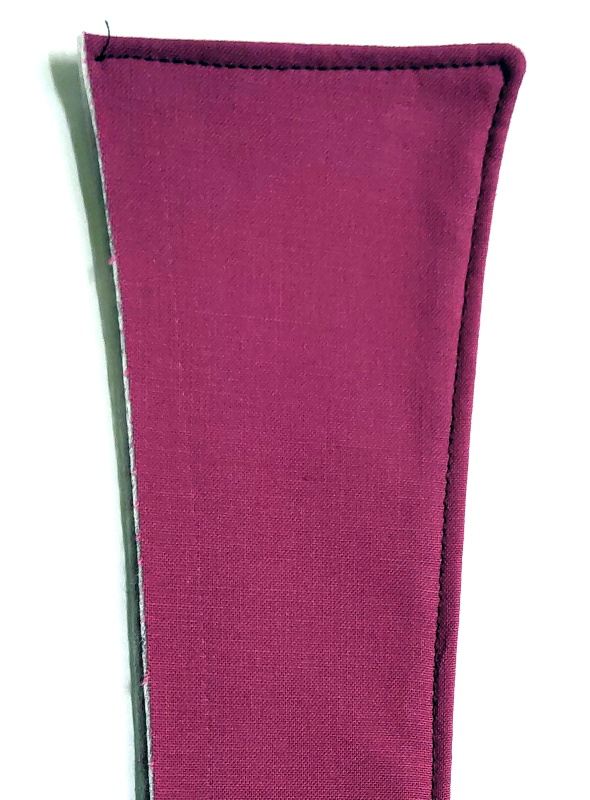
And this is where another thing will be changed. See those three or four stitches that close up the cuff on the side? These were necessary because the cuffs are kept open by the seam allowance, in order to sandwich the seam allowance of the sleeves and sew them together. Additional to that long edge stitching to join the parts, a couple of stitches are then needed to also close up the corner of the cuffs.
By disassembling a shirt I had, I found that its cuffs are sewn differently, and it is actually quite easy to close the cuff's sides before turning it inside in. You basically fold over the seam allowance of the cuff and sew it in as well. The result is very clean and will, I think, also be less fiddly when joining the sleeve. I'll report on that once it's done and there are photos to explain.
My button stitching could be improved...
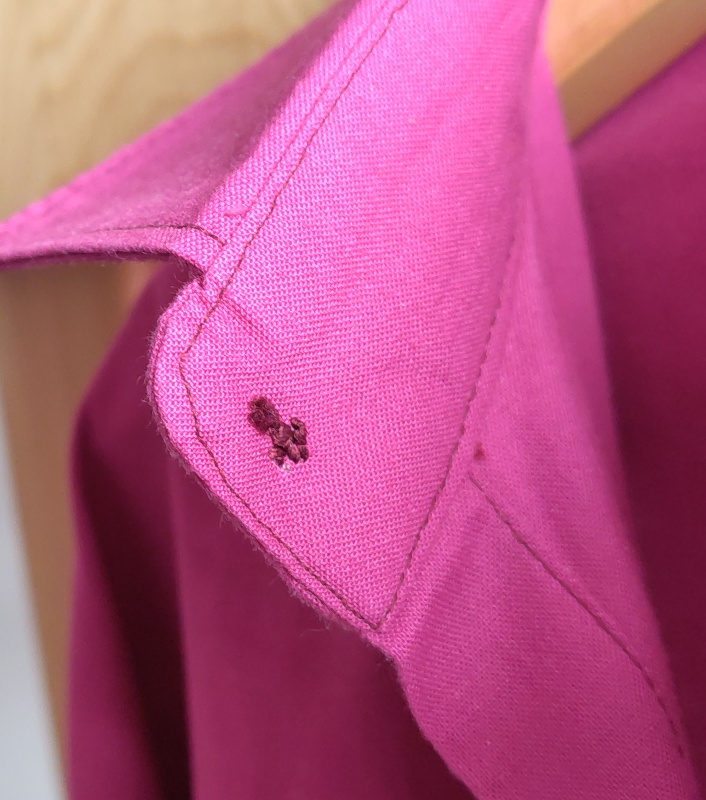 The collar stand has some visible crime because I cannot sew corners well yet.
It is surprisingly not very obvious when wearing the shirt.
The collar stand has some visible crime because I cannot sew corners well yet.
It is surprisingly not very obvious when wearing the shirt.
 And another example of this.
 Finally, at least three crimes in one picture. Firstly, the seam
connecting the back and the sleeve on the left in this picture was not
sewn far enough, so after attaching the body to the collar stand, an
open seam – a hole! – remained. I had to hand-stitch it somehow to
close it. Very ugly, but limited, and usually hidden under the
collar.
Finally, at least three crimes in one picture. Firstly, the seam
connecting the back and the sleeve on the left in this picture was not
sewn far enough, so after attaching the body to the collar stand, an
open seam – a hole! – remained. I had to hand-stitch it somehow to
close it. Very ugly, but limited, and usually hidden under the
collar.
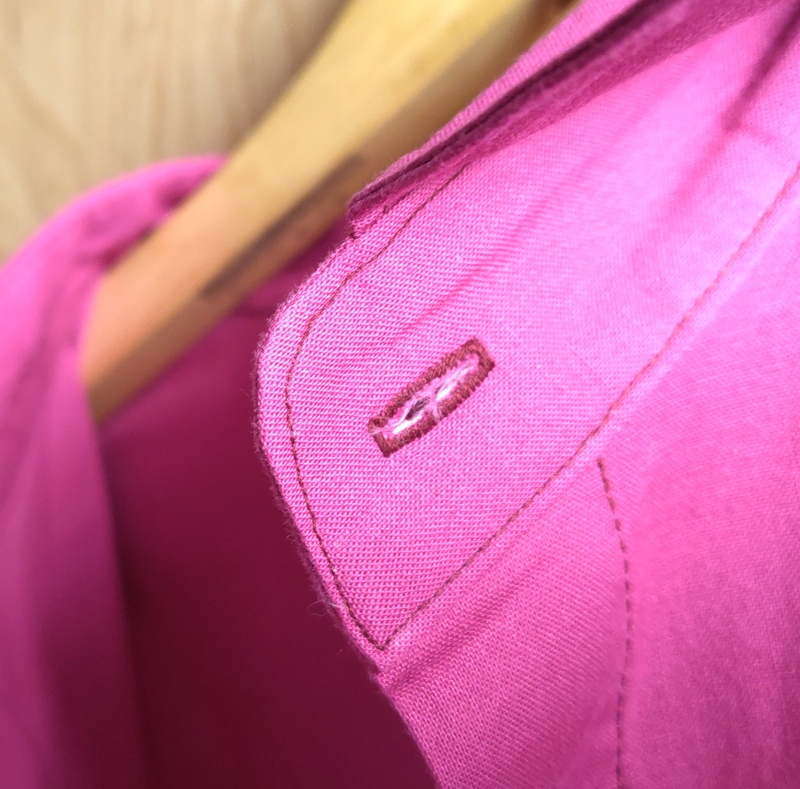
Secondly, if you look closely, the seam connecting the body and the collar stand was reopened from the center to the right, by about 6cm. There are overlapping seams at each edge of this repair. Here, my marking of the seam line was not clearly visible anymore on the body part, so when I basted this part of the sandwich, I failed to notice that the body was barely sandwiched, maybe only 2mm, and I missed the fabric when sewing it together: the parts were not even connected. So after opening the seam, I sandwiched it properly and closed it again. For some weird reason, the repair is not visible in the fabric tension. No revealing wrinkles or folds as far as I can tell.
Thirdly, the stabilizing stitching at the upper edge of the collar stand is missing. I simply forgot. I could still do it now, but I decided not to do it and see what will happen.
So that's it for now!
Oh, do you like the colour? It is purple red, and many of the images here are quite a bit off.