| « 2019-12-17 | Tinkering | 2019-04-14 » |
Tinkering: 2019-05-26: Cyclone for Shop Vac

 For a while now, I've been using my shopvac with several power tools.
In a recent project, I was amazed about how
fast the circular saw fills a dust bag. The shopvac uses 10l dust
bags, and two of them filled up in no time. It was time to build a
cyclone dust separator, so that I do not need to buy dust bags so
often anymore.
For a while now, I've been using my shopvac with several power tools.
In a recent project, I was amazed about how
fast the circular saw fills a dust bag. The shopvac uses 10l dust
bags, and two of them filled up in no time. It was time to build a
cyclone dust separator, so that I do not need to buy dust bags so
often anymore.
You may ask: why not buy the Festool cyclone instead? Because it costs around 430 EUR. I'd rather buy a Festool power tool instead. And I did: a random orbital sander! Win-win!
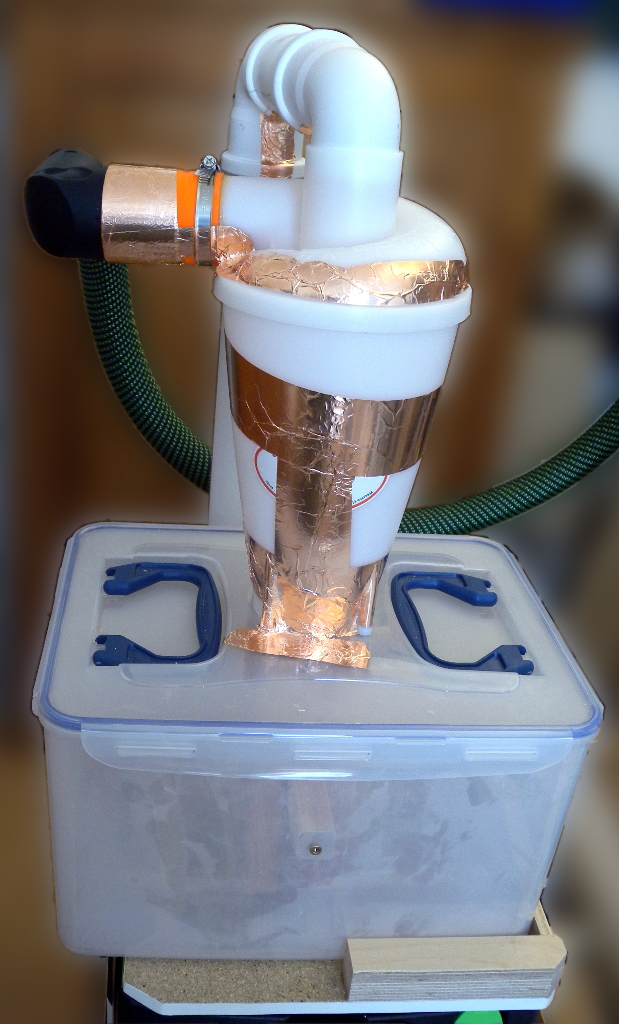
To speed up the build time, I went for a ready-to-go China cyclone from eBay. Yes, I could print one, and yes, I could build one from a bucket and some scrap wood, but this was even faster. To complete the set, I also got a few standard PVC pipes (the nicer looking white ones). I went for 50mm standard pipes (e.g. used for waste water). Finally, I got a Lock&Lock 16l container for the dust. You could use virtually anything (plastic or metal buckets for example), but I like that this container is transparent so I can see how full it is, and it is already air-tight.
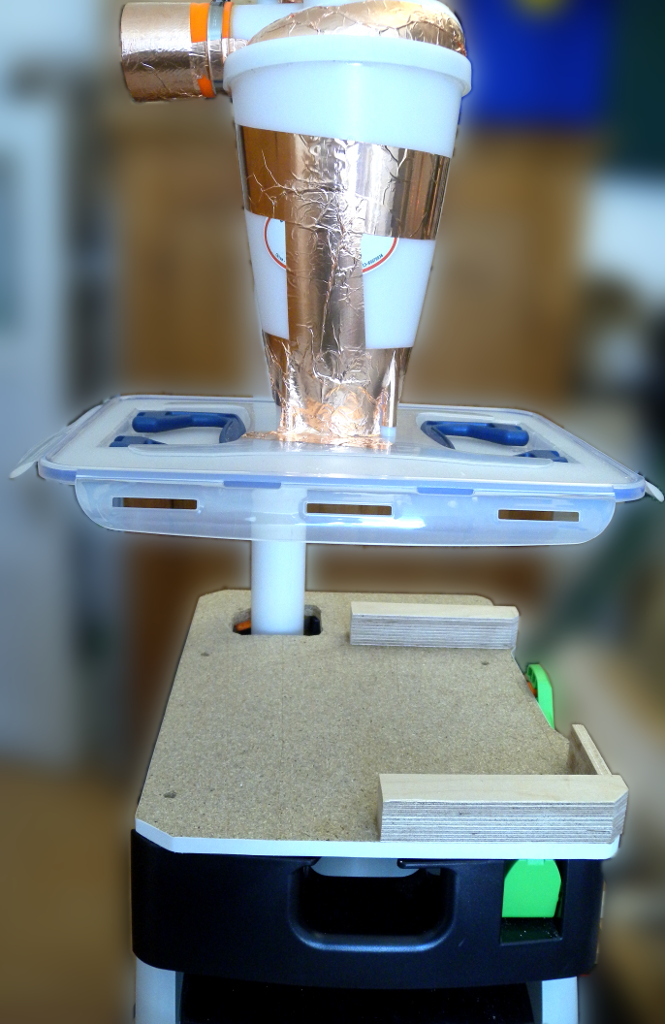
There is a drawback: when I let the shopvac suck on that plastic container, I was surprised about the suction power and I feared the container could implode. So I added a simple wooden interior skeleton to the container to keep it in shape even under full suction.
You could do this with two arbitrary plastic buckets, some scrap wood, and some (grey) pipes and wire. I wanted to do this quickly to avoid having to buy more dust bags, so it was not the cheapest stuff. The most expensive was the dust container for 25 EUR – not exactly a cheap plastic bucket, but it comes with an air tight quick-lock lid and thus solves some of the construction problems. The Festool cyclone plastic bucket costs 85 EUR.
Let's quickly forget about these boring money considerations and get to work (= 3D printing). All I need now is two adapters for the Festool shopvac and the hose.
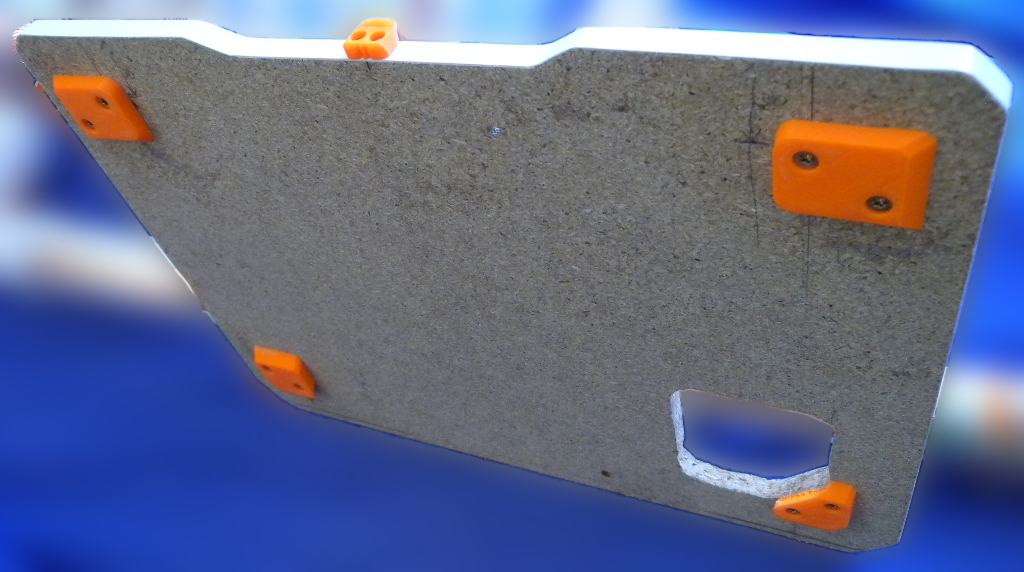 And I want to mount this onto the shopvac, and for this, I want to
exploit the Festool systainer quick-lock system. The systainer
adapter will be the next project in this blog – it is generic and can
be used for other projects, too.
And I want to mount this onto the shopvac, and for this, I want to
exploit the Festool systainer quick-lock system. The systainer
adapter will be the next project in this blog – it is generic and can
be used for other projects, too.
Do you notice that one of the orange plastic parts is cut in half? Yes, it was done for the hole for the pipe. The plastic parts use a diagonal arrangement of screw holes exactly so that they can be used for projects like this.
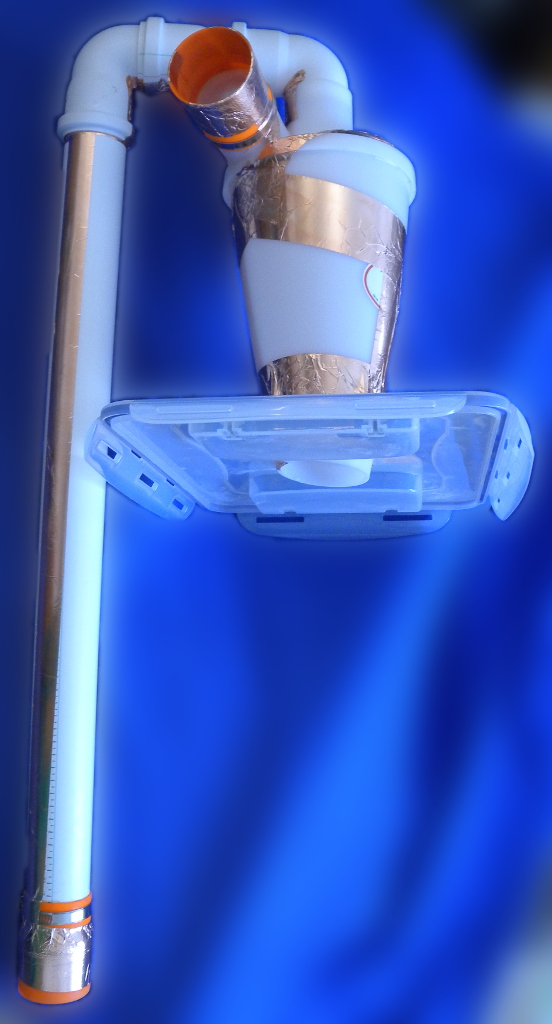 Since the 50mm pipes, which are standardized as 'DN50' in Germany, fit
the China cyclone, no adapters are needed to connect the pipes to the
cyclone. Only the air inlet needs to connect to the hose, and the air
outlet pipe needs to go into the shopvac.
Since the 50mm pipes, which are standardized as 'DN50' in Germany, fit
the China cyclone, no adapters are needed to connect the pipes to the
cyclone. Only the air inlet needs to connect to the hose, and the air
outlet pipe needs to go into the shopvac.
The adapters are for a Festool CTL Mini (up to 2018). I assume they fit other Festool shopvacs, but I did not try. The hose attaches to the shopvac using a snug friction fit, so getting the sizes right is quite crucial for this print. I usually use ABS and it shrinks a bit (round pipe shaped things by about 0.7%), and the printer squishes the plastic a bit (by about 0.2mm on each side) so the models correct for this.
The rest of the build is straightforward: cut the pipes, put it all together. I secured the printed adapters with Pattex glue (no fancy PVC-ABS welding glue, just plain Pattex is already fine) and a hose clamp (this is clearly overkill).
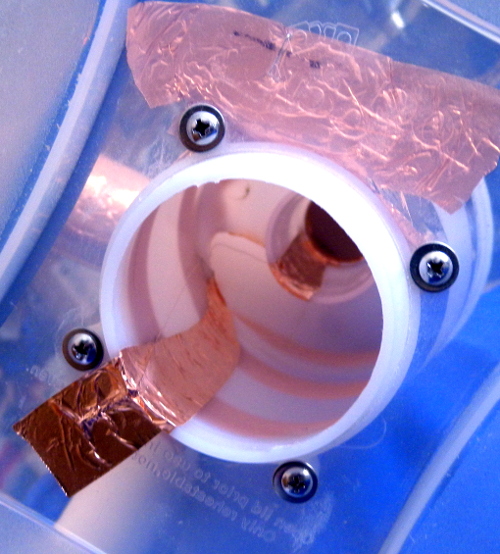 Finally, to avoid static electricity build-up, which can be quite
significant (and painful!), particularly when fine sanding dust is
sucked in, the hole thing needs a
generous amount of copper foil tape to ground everything.
The shopvac
has an earth connector where the hose is attached, and the hose is
anti-static, and uses conductive plastic parts to ensure grounding.
Fancy. I used copper tape (with conductive glue) instead, and it works
fine. Both inner and outer parts have a line of copper tape. I tested
with am Ohm meter that, indeed, all the copper parts are connected to the
ground pin in the electric plug of the shopvac.
Finally, to avoid static electricity build-up, which can be quite
significant (and painful!), particularly when fine sanding dust is
sucked in, the hole thing needs a
generous amount of copper foil tape to ground everything.
The shopvac
has an earth connector where the hose is attached, and the hose is
anti-static, and uses conductive plastic parts to ensure grounding.
Fancy. I used copper tape (with conductive glue) instead, and it works
fine. Both inner and outer parts have a line of copper tape. I tested
with am Ohm meter that, indeed, all the copper parts are connected to the
ground pin in the electric plug of the shopvac.
That's it. Works like a charm – a rough test shows that more than 95% of the dust is thrown into the cyclone dust container, which means I need only a 1/20 of the dust bags now.
All the files can be downloaded from the Thingiverse page of this project.
Now that this is done, I understand that I could now swap the dust container for a clean plastic container for vacuum molding with this device, e.g., when working with epoxy. No modification needed. Nice!